How to Run Stable Diffusion
| Read the Spanish version 🇪🇸 of this article. |
In collaboration with several academic researchers and non-profit organizations, a startup named Stability AI, founded in 2019, developed the Stable Diffusion model, which was later released in 2022.
It’s effectively an open-source deep learning model primarily tasked with generating high-quality, detailed images from text. However, you can also use text to modify images or fill in details for low-resolution images.
Stable Diffusion was initially trained on 2.3 billion images and is said to be capable of producing results comparable to that of DALL-E 2.
In this article, we will scratch the surface of how it works and then cover a few ways you can run it for yourself.
How Does Stable Diffusion Work?
The stable diffusion model falls under a class of deep learning models known as diffusion. More specifically, they are generative models; this means they are trained to generate new data similar to what it’s learned in the past.
As a side note, generative modeling is a type of unsupervised learning concerned with automatically discovering and learning patterns in input data such that the model may be used to output new examples that may have been drawn from the original data.
Stable diffusion earned the name ”diffusion” based on its striking similarities in mathematical formulation to that of diffusion in physics.
How To Run Stable Diffusion Online
If you wish to get started with the Stable diffusion model right away, you can do so by running it online using the following tools.
DreamStudio
Stability AI, the creators of Stable Diffusion, have made it extremely simple for curious parties to test their text-to-image model with their online tool. This platform grants users access to the latest version of stable diffusion models, which allows you to generate an image in up to 15 seconds.
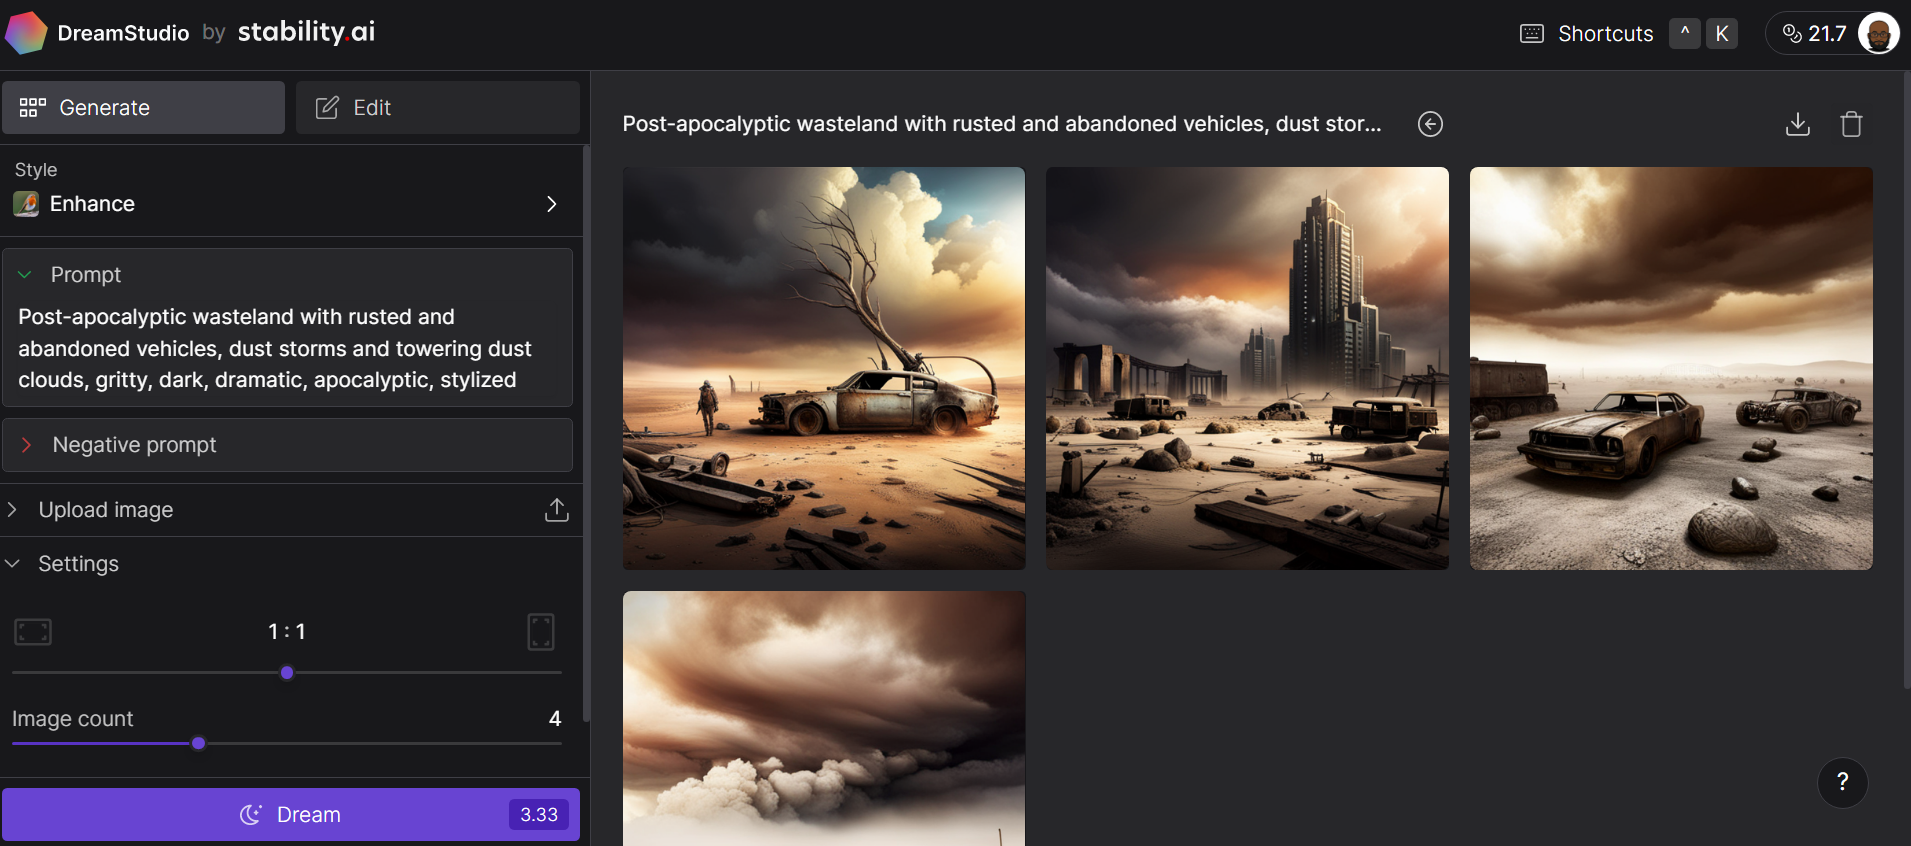
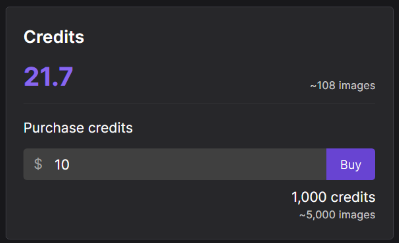
Note you would have to sign up to DreamsStudio to use the tool. New users are granted 25 credits (at the time of writing) upon creating an account, which gives you approximately 100+ images. If you need more, you can easily purchase extra credits from the account dashboard.
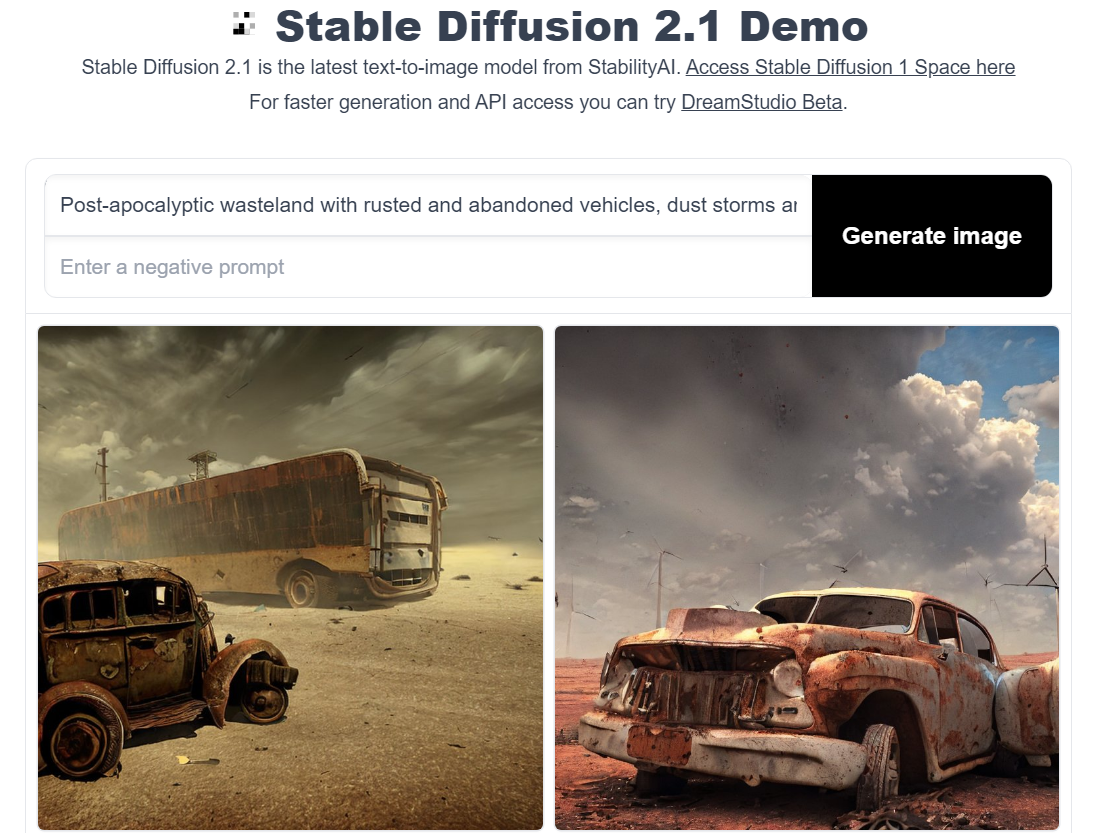
Hugging Face Stable Diffusion
Hugging Face is an AI community and platform that promotes open-source contributions. Though it’s highly recognized for its transformer models, hugging face also provides access to the latest Stable diffusion model; and like a true lover of open-source, it’s free. The tradeoff with hugging face is you’re unable to customize properties as you are in DreamsStudio, and it takes noticeably more time to generate an image.
How to Run Stable Diffusion Locally
But what if you want to experiment with Stable Diffusion on your local computer?
We’ve got you covered.
Running Stable Diffusion locally enables you to experiment with various text inputs to generate images more tailored to your requirements. Also, you may fine-tune the model on your data to improve the results given the inputs you provide.
Disclaimer: You must have a GPU to run stable diffusion on your PC.
Step 1: Install Python & Git
You will require Python 3.10.6 to run Stable Diffusion from your local computer; this can be installed from the official Python Website. If you get stuck, check out our How to Install Python tutorial.
Check the installation worked correctly by opening the command prompt, typing python, and executing the command; this should print the version of Python you’re using.
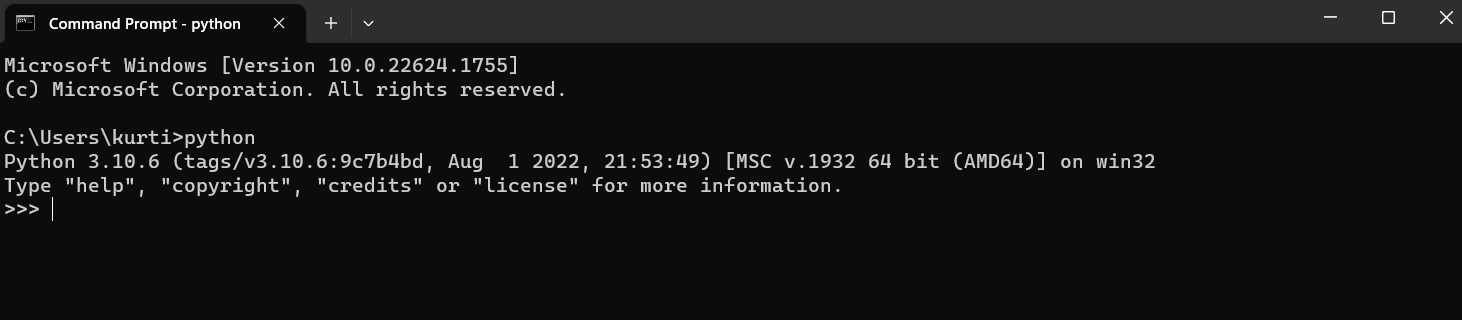
If you don’t see Python version 3.10.6, ensure you’ve removed all other versions of Python from your PC.
Disclaimer: Don’t proceed without Python 3.10.6.
Next, you must install the code repository management system, Git; the Git Install Tutorial is there to help you get stuck, and our Introduction to Git course is available if you wish to deepen your knowledge of git.
Step 2: Create a GitHub and Hugging Face account
GitHub is a hosting service for software development; it’s where developers host their code so they can track and collaborate with other developers on software projects. If you haven’t got a Github account, now is also a good time to create one – check out Github & Git Tutorial for Beginners for assistance.
Hugging Face, on the other hand, is an AI community that advocates for open-source contributions. It serves as the hub for several models from various domains, including Natural language processing, computer vision, and more. You’ll need an account to download the latest version of Stable Diffusion – we will get to this step later.
Step 3: Clone Stable Diffusion Web-UI to your PC
This step is important but can easily get tricky; all we want to do is download the basics of the stable diffusion installation on our local PC. It helps to create a folder (i.e., stable-diffusion-demo-project) to download the repository into, but it’s not a necessary requirement.
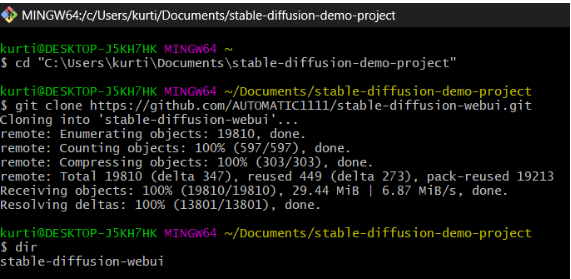
For this step, you’ll need Git bash. Navigate to the folder you would like to clone the stable diffusion web UI into using the following command:
cd path/to/folder Then run the following command:
git clone https://github.com/AUTOMATIC1111/stable-diffusion-webui.gitIf the command is executed successfully, you should now have a folder called stable-diffusion-webui.
Step 4: Download the Latest Stable Diffusion model
Here’s where your Hugging Face account comes in handy; Login to Hugging Face, and download a Stable Diffusion model. Note this may take a few minutes because it’s quite a large file.
Once you’ve downloaded the model, navigate to the “models” folder inside the stable diffusion webui folder. In there, there should be a “stable-diffusion” folder that contains a text file called “Put Stable Diffusion Checkpoints here.”
Now, move the recently downloaded Stable Diffusion model to this folder.
Here’s the path for clarity:
stable-diffusion-webui\models\Stable-diffusionStep 5: Setup the Web-UI
The next step is to install the tools required to run stable diffusion; this step can take approximately 10 minutes.
Open your command prompt and navigate to the stable-diffusion-webui folder using the following command:
cd path/to/stable-diffusion-webuiOnce you’re there, run:
webui-user.batThis will create a virtual environment and install all the dependencies required.
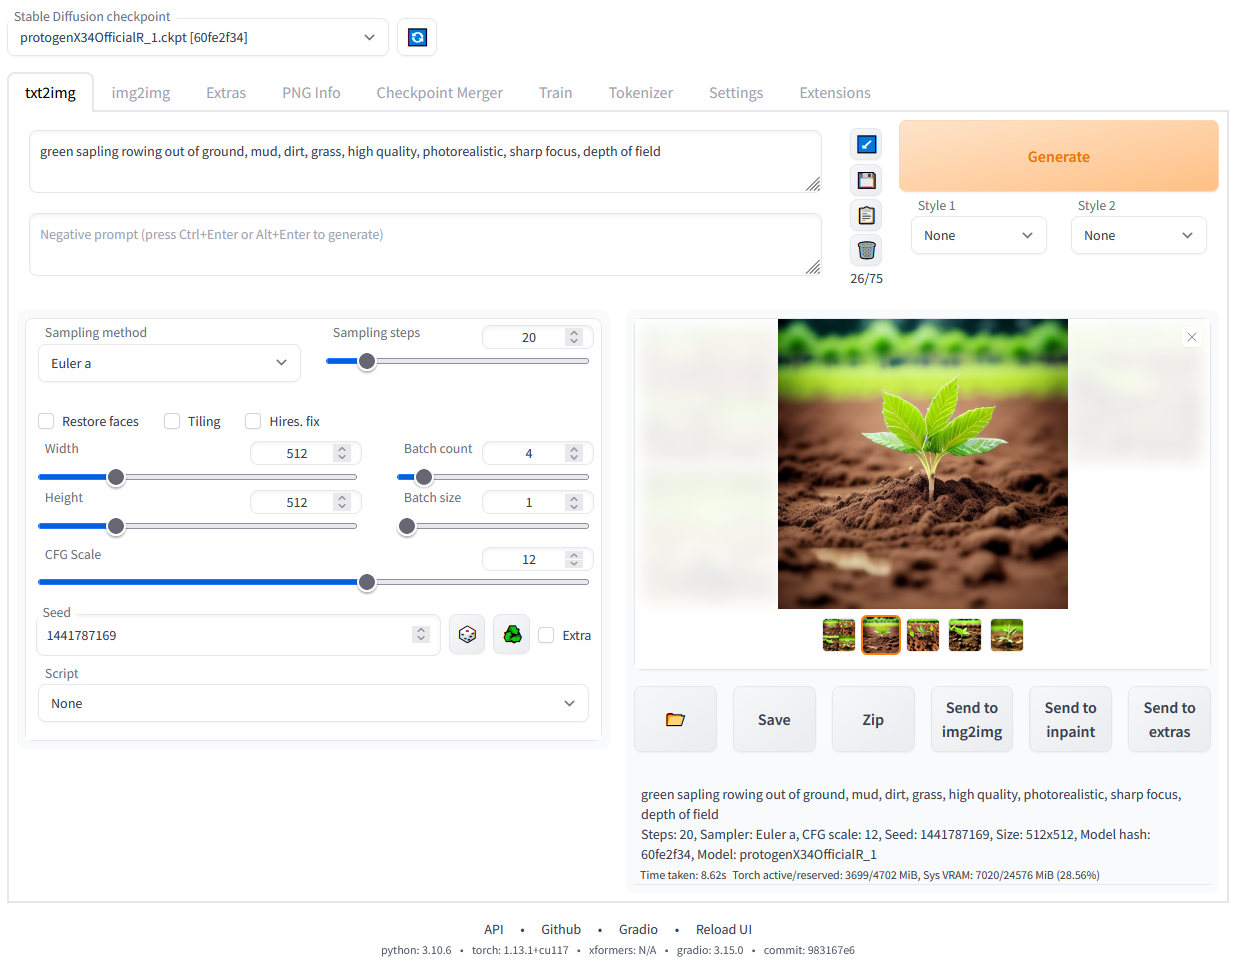
Step 6: Run Stable Diffusion
After the dependencies have been installed, a URL will appear in your command promt: “http://127.0.0.1:7860.” Copy and paste this into your address bar to run the Stable Diffusion web-ui.
Learn more about generative AI
Generative AI refers to a mode of deep learning capable of generating high-quality text, images, etc., based on what the model was trained on. Tools like Stable Diffusion, ChatGPT, DALL-E, etc., are great examples of generative AI that have been making waves of late.
If you’re not up to speed with Generative AI, check out the resources listed below to get up to speed.
Get certified in your dream Data Scientist role
Our certification programs help you stand out and prove your skills are job-ready to potential employers.


You’re invited! Join us for Radar: AI Edition
DataCamp Team
2 min

The Art of Prompt Engineering with Alex Banks, Founder and Educator, Sunday Signal

Adel Nehme
44 min

The Future of Programming with Kyle Daigle, COO at GitHub
Adel Nehme
48 min
A Comprehensive Guide to Working with the Mistral Large Model

Josep Ferrer
12 min
Serving an LLM Application as an API Endpoint using FastAPI in Python

Moez Ali
How to Improve RAG Performance: 5 Key Techniques with Examples

Eugenia Anello