
Certification available
Course
Intermediate Python
4 hr
1.1M
Every job comes with its tedious, repetitive tasks. Whether you’re a support agent needing to report on common themes in help requests, a team manager who needs to track performance metrics, or a software engineer who needs to check on key business processes to see everything is in good shape, you have to do these things over and over again, monthly, weekly, daily, maybe even hourly!
In many cases, though, you should be able to automate at least some of this repetitive work. Python can be a great driver for that: it’s a general-purpose programming language that works well with (large amounts of) data while at the same time being easy to script automation scripts in. Reporting on performance metrics? Without automation, you may need to look in 4 different dashboards to get all the numbers you need and compile those in a message to your boss. With automation, a Python script pulls all the data you need, picks out the important summary numbers, compiles them, and sends this message without your involvement. It’s not only convenient, it’s also less prone to errors and forgetting!
In this tutorial, we’ll look at the specific case of running Python code to report on the status of an investment portfolio and send a summary of this portfolio to Slack, a widely used team communication platform. We’ll cover all the necessary steps to configure a Slack app, a Python program that leverages that Slack app to send messages, and set up a schedule so your Python script can run on a regular cadence. This specific example is about tracking an investment portfolio, but you can, of course, swap out this ‘business logic’ with anything you want; all the configuration and code to send the message to Slack will stay exactly the same.
We’ll use DataLab in this tutorial, as it has built-in functionality for securely storing secrets as environment variables (a feature we’ll use to store the Slack app credentials) as well as for scheduling your Python code with a couple of clicks. To follow along, all you need is a Slack account (to post messages) and a DataCamp account (to use DataLab), both of which you can create for free!
Let’s dive in!
You can think of a Slack app as an extension or add-on of Slack for a specific purpose. There are Slack apps to integrate Google Docs, Jira, Dropbox, Zoom, and countless others into Slack, so you can be notified inside Slack of things that happen, but you can also perform actions in those apps from within Slack. For our little project, we also need to create a Slack app so we can leverage the bot user that comes with every Slack app to send messages to Slack.
To start, make sure you have a Slack account, you are a member of a Slack workspace that you have admin access to, and you’re signed in with this Slack account. If not, head over to slack.com and create a new account and workspace.
Next, head over to https://api.slack.com/app, your Slack apps dashboard. It will look something like this:
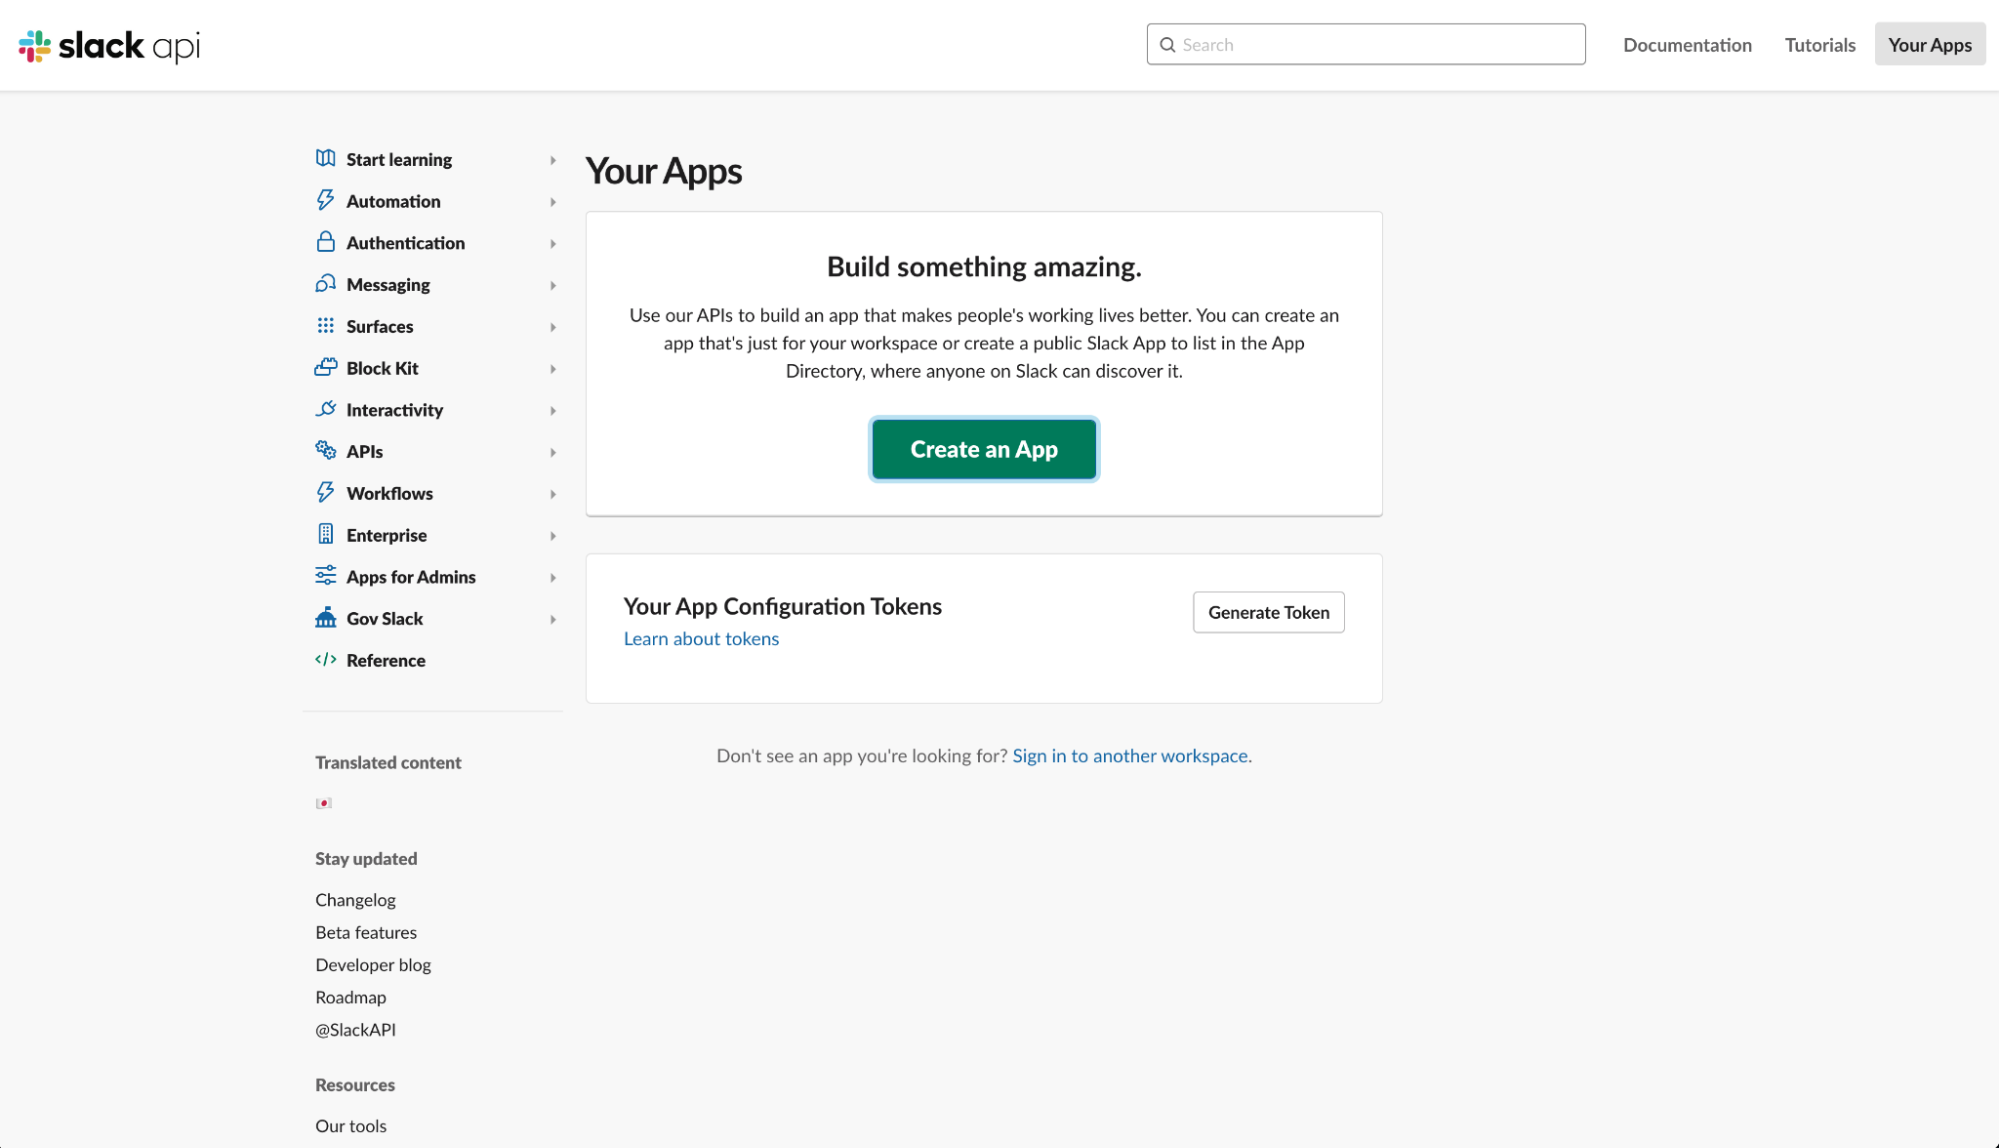
Click on “Create an App”
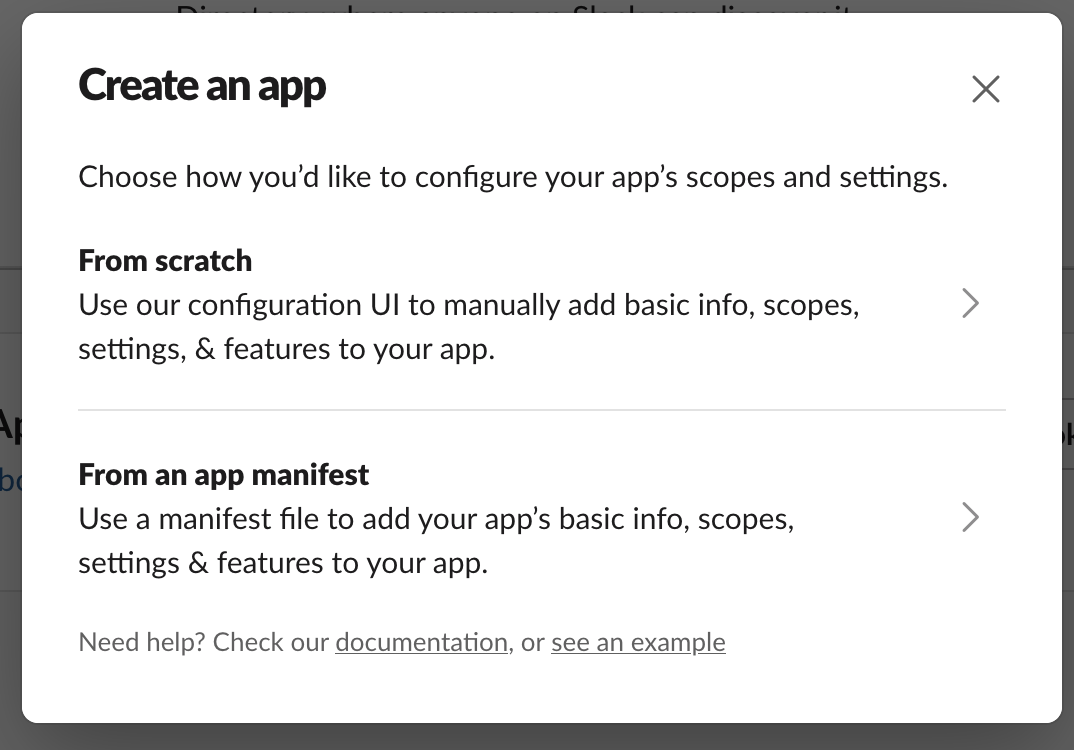
Select “From scratch.” In the next screen, specify a name for your app, e.g., “Python Messenger,” and specify the workspace in which you want to develop this app (for your case, this workspace will be different).
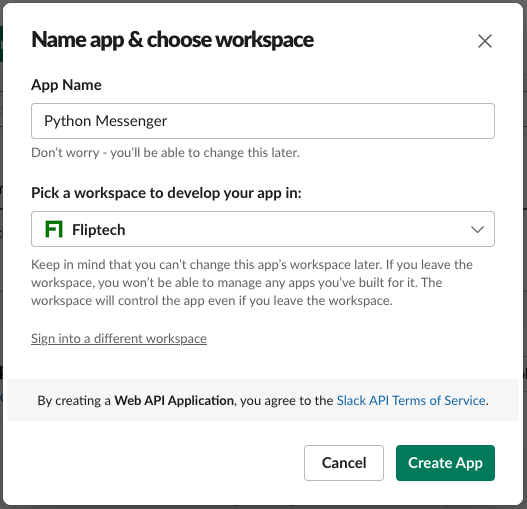
Click on Create app. You now land on your newly created app homepage, where you can configure all the app’s settings, ranging from basic information to who else can make changes to this app and all features. Don’t be overwhelmed by this! We will only need to set a couple of settings.
Head over to the “OAuth & Permissions” tab, scroll down to the Scopes card, and under Bot Token Scopes, click “Add an OAuth Scope” to add the ‘chat:write’, ‘chat:write.customize’, ‘files:read’, ‘files:write’ scopes (you’ll need to click “Add an OAuth Scope four times in total).
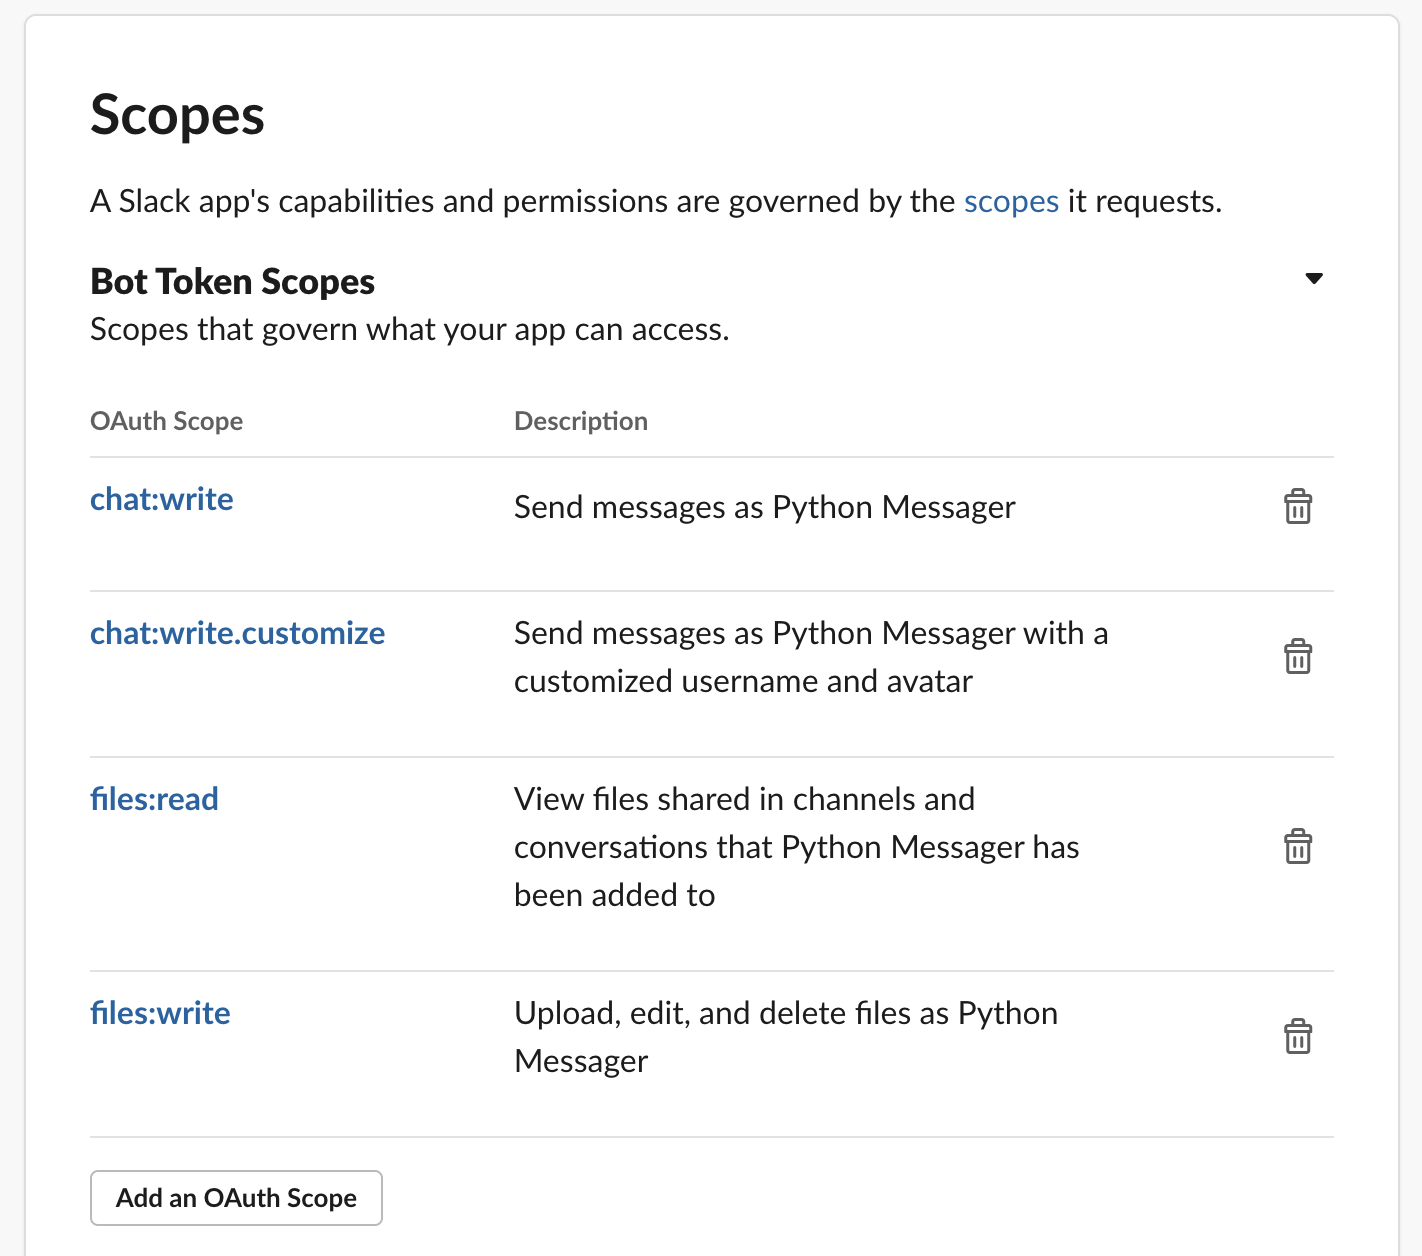
These bot token scopes specify what the bot user of your app is capable of doing inside your Slack workspace. Following the principle of least privilege, rather than giving this app access to all content and giving this app all thinkable permissions, we’re restricting the app to just writing (customized) chat messages and uploading and downloading files (helpful if you want to include attachments in your messages).
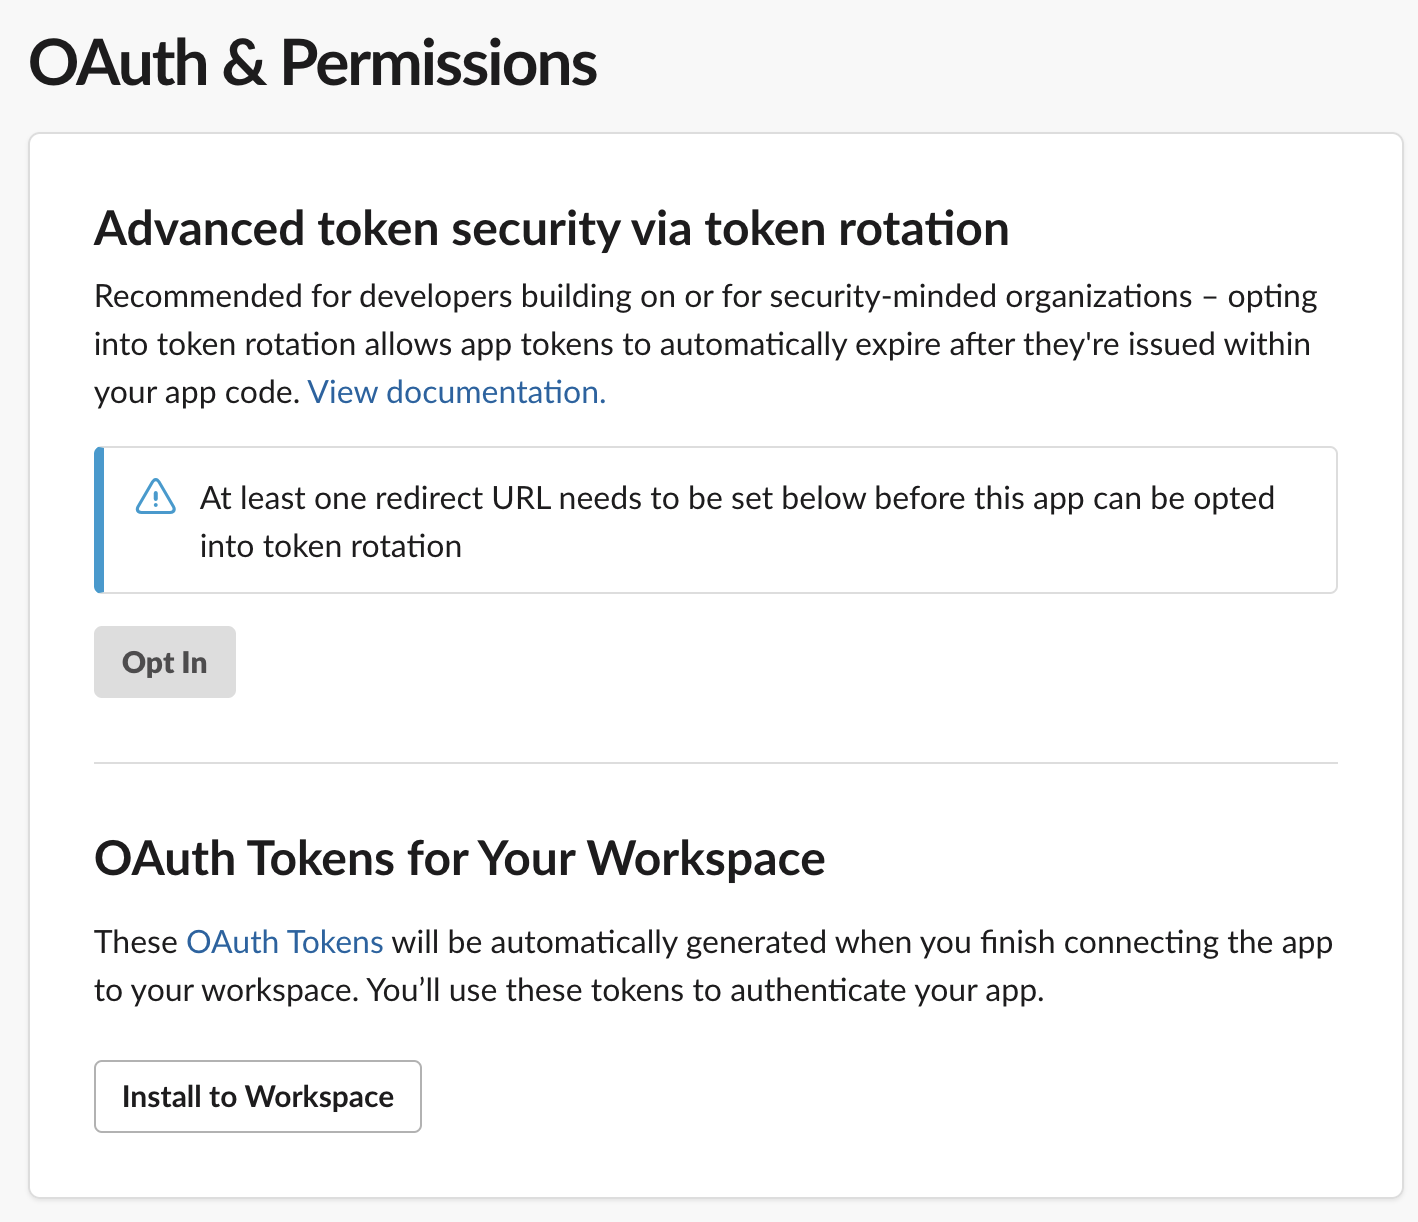
Now you can scroll up to the “OAuth Tokens for Your Workspace” section, and click “Install to Workspace”:
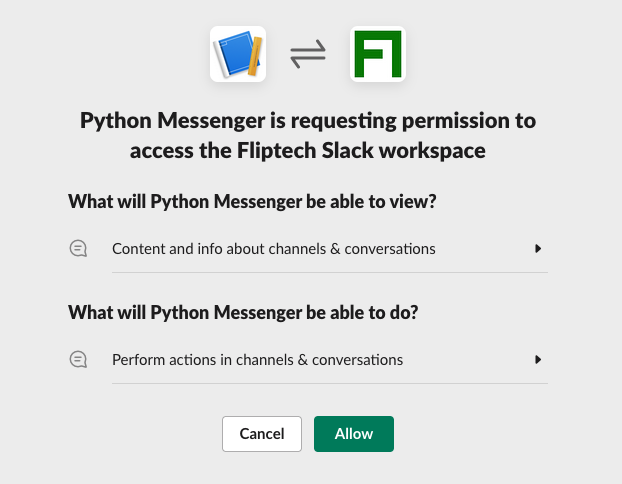
On the next screen that summarizes the scopes that you specified in the previous steps, click Allow.
You’ll see that a “Bot User OAuth Token” has been created for you:
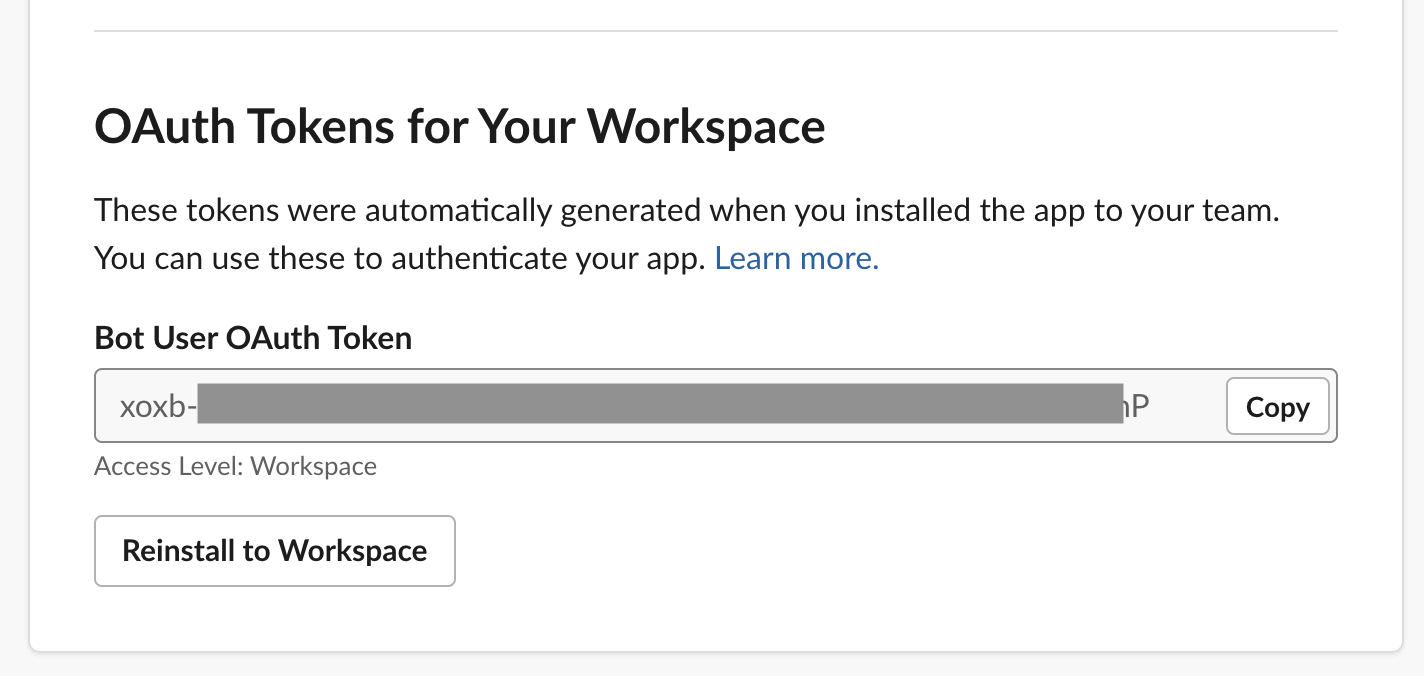
You’ll need this Bot User OAuth Token in a later stage, so don’t close your browser window.
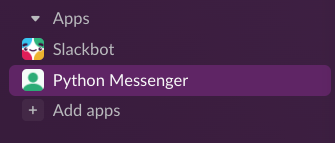
Open Slack and notice that a new app “Python Messenger” (or whatever you’ve called it) has appeared in your sidebar:
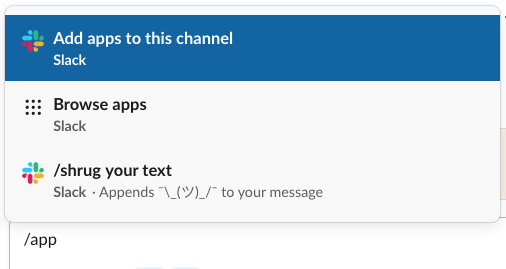
The final configuration step is configuring the Slack channel that you’ll want to send the automated messages to. Create a new channel called #bot-updates. In the channel, type /app and select “Add apps to this channel”:
Next to “Python messenger”, click on “Add”. You’ll see that the “Python Messenger” app has joined the channel.
That’s it! Right now your Slack channel is ready to receive messages through the “Python Messenger” app, using the generated Bot User OAuth Token. Note that while there were quite some steps, this is a one-time setup for every Slack workspace. If you want to have multiple Python programs sending to the same Slack workspace, you don’t have to go through this process again.
Great job making it this far! With the Slack app configured, it’s time for the fun part: writing Python. We’ll start with writing some Python code for our ‘business logic’ to solve the task at hand.
If you need a refresher on writing Python code, our Introduction to Python course is the ideal place to start.
You can either create an empty workbook from scratch, which is useful if you already know what Python program you want to automate and integrate with Slack.
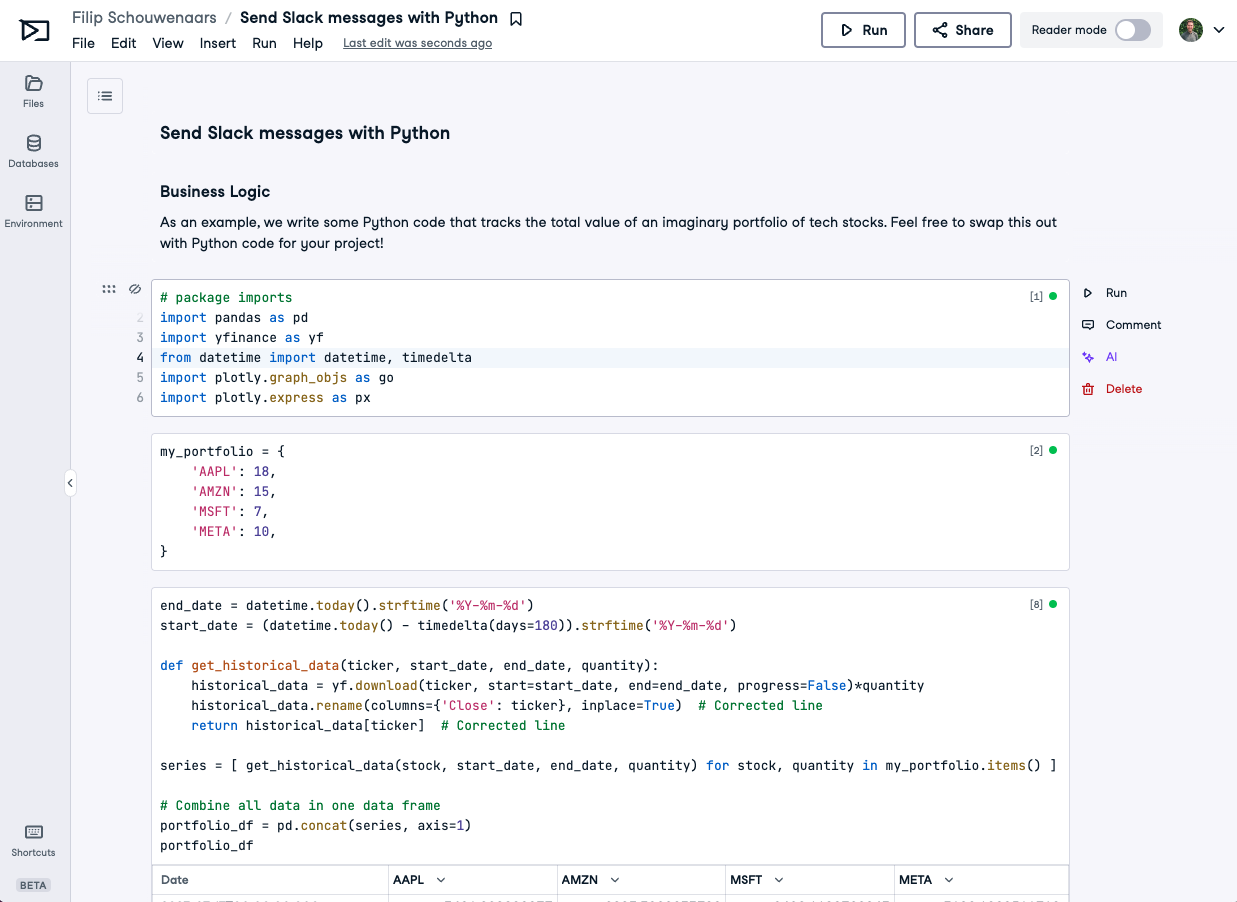
If you’re here to learn about the concepts, you can start with a sample workbook that we’ve created that tracks the value of an imaginary portfolio of tech stocks. Every day (except on weekends), there will be new data, so this is a great candidate for daily reporting.
Run and edit the code from this tutorial online
Run CodeIn both cases, you should end up with a DataLab workbook with your business logic all coded up:
So, Slack app: check. Business logic: check. To integrate the Python notebook with Slack, we need to do two things: storing the Slack OAuth token in the workbook and writing some Python code to send a Slack message.
Our Python notebook needs the OAuth token to prove that it’s authorized to send messages to your Slack workspace. You could just copy and paste this OAuth token inside a code cell of your notebook. However, this is not a secure approach and is not recommended. If you share your notebook with someone else, they can see the OAuth token.
This approach would also require you to repeat this copy-pasting in every workbook that you want to send Slack messages with. If you want to update this OAuth token, you’ll have to go through and edit every workbook.
A more secure and scalable approach is storing the Slack OAuth token in a so-called environment variable. When you connect this environment variable, it will become available in your Python session. In your workbook:
SLACK_TOKEN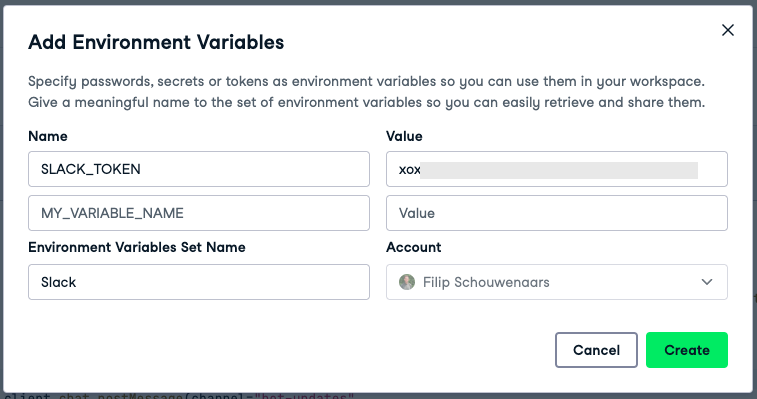
After filling in all fields, click “Create,” “Next,” and finally, “Connect.” Your DataLab session will restart, and SLACK_TOKEN will now be available as an environment variable in your workbook. You can verify this by creating a Python cell with the following code and running it:
import os
slack_token = os.environ["SLACK_TOKEN"]
print(slack_token)
If you want to reuse the same services account credentials in another workbook, you don’t need to set up the environment variable again: you can reuse the environment variable in other workbooks.
With the SLACK_TOKEN locked and loaded, include a small snippet at the bottom of your notebook that sends a sample message to the #bot-updates channel in your Slack workspace:
import os
from slack_sdk import WebClient

message = "This is my first Slack message from Python!"

# Set up a WebClient with the Slack OAuth token
client = WebClient(token=os.environ["SLACK_TOKEN"])

# Send a message
client.chat_postMessage(
    channel="bot-updates",
    text=message,
    username="Bot User"
)
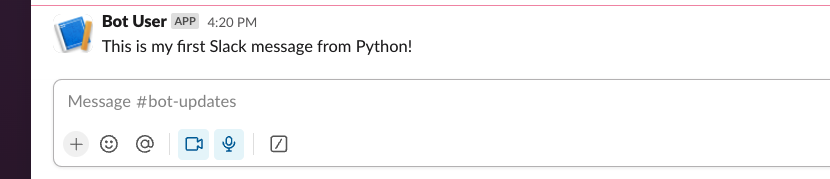
This code uses Slack’s official Python SDK. Run this code! You should see this message appear in your Slack workspace:
This was a meaningless sample message, but you can also create a message based on the result of your business logic, like we did in the sample workbook:
message = f"Total value of my portfolio on {portfolio_df.index[-1]:%B %d, %Y} is ${latest_total:,.2f}."With the following result:

Finally, you can also leverage the DC_WORKSPACE_ID environment variable to include a link to your workbook, in case you want to include an easy way to go from Slack to the DataLab workbook that’s powering this message:
message = f"""
Total value of my portfolio on {portfolio_df.index[-1]:%B %d, %Y} is ${latest_total:,.2f}.
For the full analysis, check <https://www.datacamp.com/workbook/w/{os.environ.get('DC_WORKSPACE_ID', 'invalid')}/edit|this workbook> (updates daily)
"""
With the following result:

You’ve written a Python script that does a relevant analysis and sends a summary of that analysis to Slack, with a backlink to the full notebook in case people want to dive deeper. Sweet! But wouldn’t it be cool if you could configure this notebook to run every week or every day so you’re automatically kept up to date on new results? The good news is you can! DataLab supports scheduled runs to do just that.
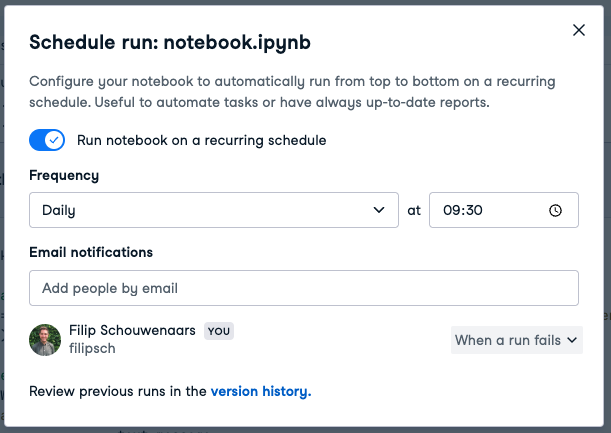
If configured like in the screenshot above, the notebook will now run at 9:30AM local time every day, which means that a message will be posted in the #bot-updates channel on Slack every morning.
Not all tasks are worth automating, depending on how often you have to do it, how long it takes to do it manually, and how long it takes to build a Python script that does it for you. This becomes clear with an example: say you have to compile a report every year that takes 20 minutes to put together manually. If it would take you half a day to write a Python script that does it for you, it’ll take a lot of years before you’ll have gained back the time spent automating the task!
This is aptly summarized in this table:
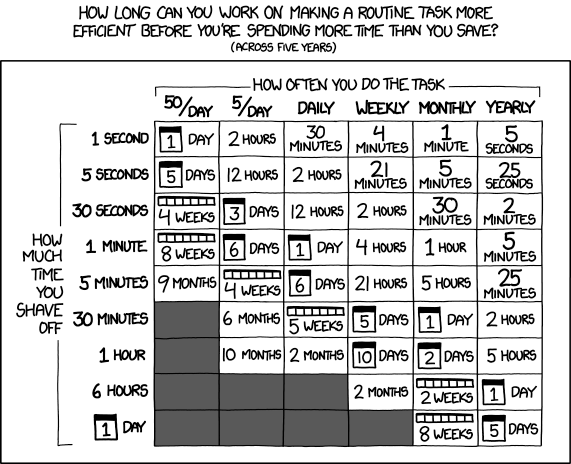
Is it worth the time to automate? Source
So if a task that you had to do daily took 5 minutes before, you can spend up to 6 days to try and automate that task. If you spend less time than that automating, you’ll have gained time (counted across 5 years).
The initial setup before you can send messages from DataLab to Slack can take a while. However, once things are properly configured with the Slack token stored in DataLab, sending a message is a matter of adding two lines of Python: it’s that simple! And look at the upside: you can now automate virtually any Python script and notify your stakeholders where they are: in Slack.
Out with the times of setting reminders to perform the same boring tasks over and over again and in with the times of powerful, automated workflows without having to jump between tools. All you need is love DataLab.
Elevate your Python skills to the next level with DataCamp's Intermediate Python course. Expand your knowledge in data visualization and advanced Python features. Continue your learning journey now!
Continue Your Python Journey Today!
Course
Course
Course
Amberle McKee
Adel Nehme
Amberle McKee
Adel Nehme
Bex Tuychiev
Adel Nehme