Course
Developing LLM Applications with LangChain
4 hr
2.3K
It's an exciting time in the world of AI. Big companies like Google, Meta, and Twitter are focusing heavily on making their large language models (LLMs) open-source. Recently, the Google DeepMind team launched Gemma - a family of lightweight and open-source LLMs built from the same research and technology used to create Google's Gemini models.
Image Source
Here, we will learn about the Gemma models, how to access them using cloud GPUs and TPUs, and how to train the latest Gemma 7b-it model on a role-play dataset.
Gemma (the Latin word for “precious stone”) is a family of text-to-text, decoder-only, open models developed by various teams at Google, especially Google Deepmind. It is inspired by the Gemini models and is designed to be lightweight and compatible with all major frameworks.
Google has released model weights for two sizes of Gemma, namely, Gemma 2B and Gemma 7B, which are available with pre-trained and instruction-tuned variants such as Gemma 2B-it and Gemma 7B-it.
As we know, Gemma shares similar technical components with Gemini, achieving best-in-class performance for their sizes compared to other open models like Meta’s Llama-2 model. It has outperformed Llama-2 on all LLM benchmarks.
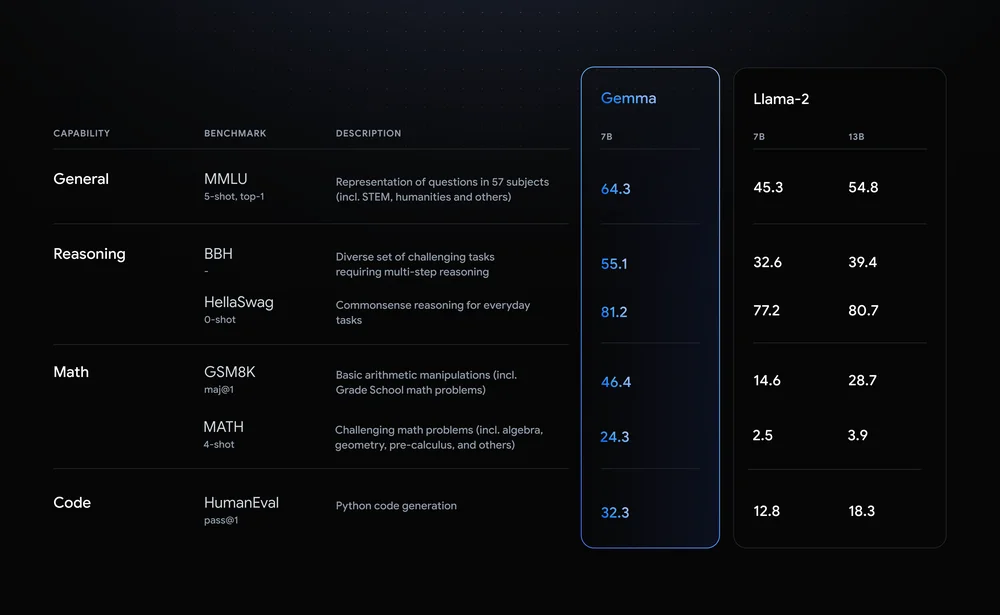
Image Source
Gemma supports a wide variety of tools and systems, including multi-framework tools like Keras 3.0, native PyTorch, JAX, and Hugging Face Transformers. It also runs across popular device types, including laptop, desktop, IoT, mobile, and cloud.
You can now run inference and supervised fine-tuning (SFT) on free Cloud TPUs using your favorite machine learning framework like Keras 3.0.
Google has also introduced a Responsible Generative AI Toolkit along with Gemma to offer guidance, essential tools, and safety classification methods for developers to create safer AI applications.
If you are new to the world of AI and LLMs, it is recommended that you take the AI Fundamentals skill track. This will equip you with practical knowledge of popular AI topics such as ChatGPT, large language models, generative AI, and more.
Accessing Gemma is super easy; you can start using it for free on HuggingChat and Poe. You can even use it locally by downloading the model weights from Hugging Face and using either GPT4ALL or LMStudio.
In this section, we will learn to load the Gemma model and run inference using free GPUs and TPUs provided by the Kaggle platform.
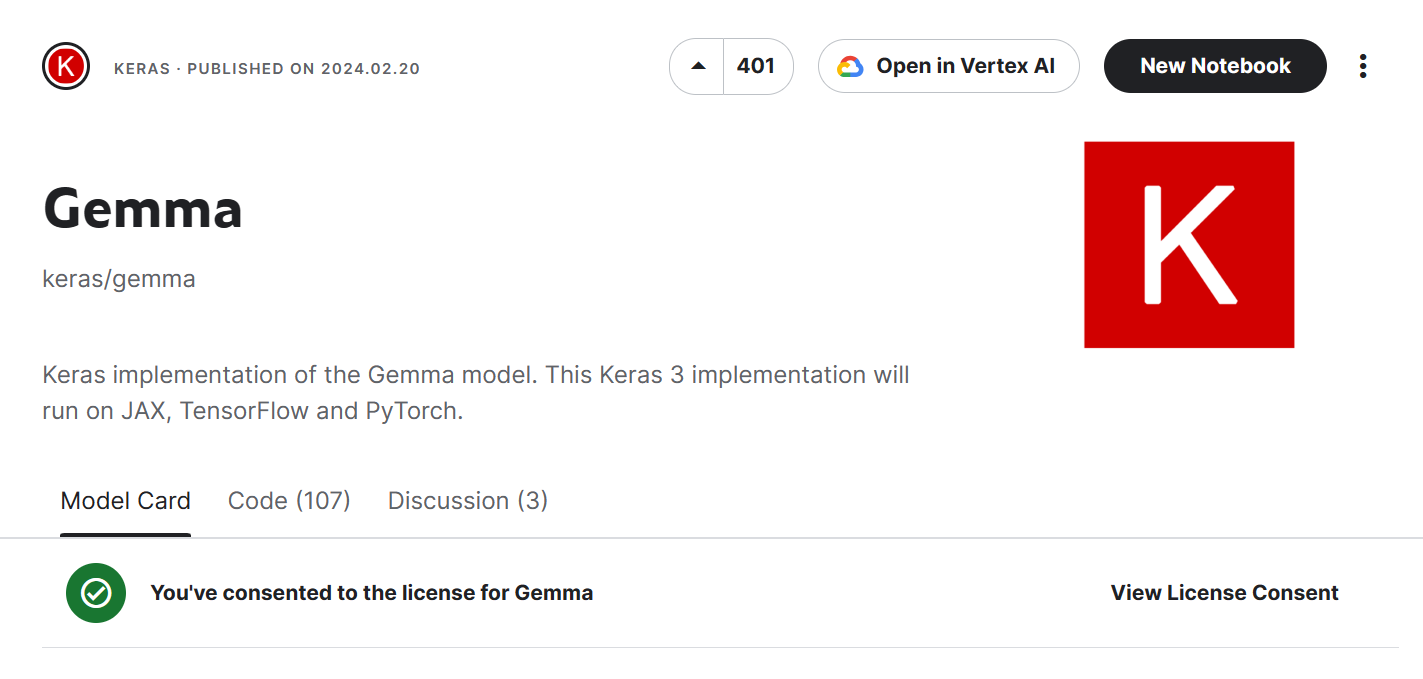
You can go to Keras/Gemma, scroll down, select the “gemma_instruct_2b_en” model variant, and click on the “New Notebook” button. It will launch a Cloud Notebook with the Gemma model in the input directory.
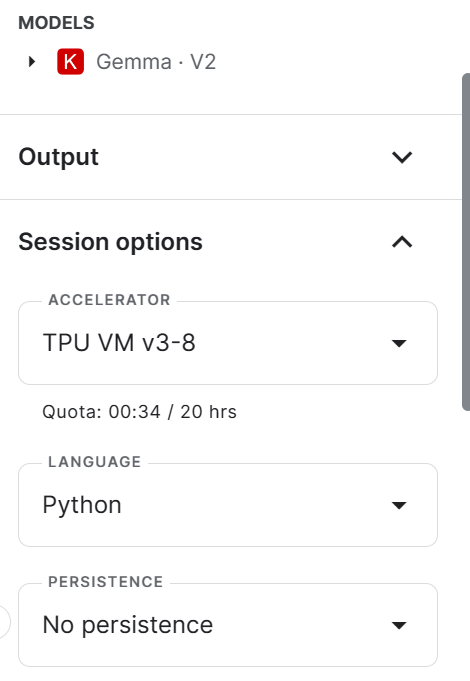
Select the accelerator as “TPU VM v3-8” by going to the right panel and scrolling down.
Ensure that you have installed and updated all the necessary Python libraries.
!pip install -q tensorflow-cpu
!pip install -q -U keras-nlp tensorflow-hub
!pip install -q -U keras>=3
!pip install -q -U tensorflow-text
To check the available number of TPUs, you can use the `jax` library and the `device` function to display the TPU devices. We have access to 8 TPUs.
import jax

jax.devices()
[TpuDevice(id=0, process_index=0, coords=(0,0,0), core_on_chip=0),
TpuDevice(id=1, process_index=0, coords=(0,0,0), core_on_chip=1),
TpuDevice(id=2, process_index=0, coords=(1,0,0), core_on_chip=0),
TpuDevice(id=3, process_index=0, coords=(1,0,0), core_on_chip=1),
TpuDevice(id=4, process_index=0, coords=(0,1,0), core_on_chip=0),
TpuDevice(id=5, process_index=0, coords=(0,1,0), core_on_chip=1),
TpuDevice(id=6, process_index=0, coords=(1,1,0), core_on_chip=0),
TpuDevice(id=7, process_index=0, coords=(1,1,0), core_on_chip=1)]We will now enable TPU for Keras 3 by setting `jax` as a Keras backend.
import os

os.environ["KERAS_BACKEND"] = "jax"
After the initial setup, accessing the Gemma model and generating the response is quite easy. We will use the `keras_nlp` library to load the model from Kaggle and then provide the prompt to the `generate` function.
import keras
import keras_nlp

model_name = "/kaggle/input/gemma/keras/gemma_instruct_2b_en/2"
gemma_lm = keras_nlp.models.GemmaCausalLM.from_preset(model_name)
prompt = "Can you share an interesting fact about Leonardo da Vinci?"

gemma_lm.generate(prompt, max_length=100)
Here’s the result:
"Can you share an interesting fact about Leonardo da Vinci?\n\nSure, here's an interesting fact about Leonardo da Vinci:\n\nLeonardo da Vinci was born in a village called Vinci, Italy, which is now part of the city of Florence."
You can easily run the Kaggle notebook (Gemma-2B-V2 Simple Inference on TPU) and start generating responses using free TPUs.
Now, we will learn to generate the response using GPUs and using a transformer framework instead of Keras.
You can go to google/gemma, scroll down, select transformers, select the “7b-it” model variant, and click on the “New Notebook” button. This will launch a Cloud Notebook with the right version of the Gemma model in the input directory.
Note: You can even scroll further down the page to access the inference section. Here, you can test all types of Gemma variants by providing a prompt response and generating the response. It is fast and convenient.
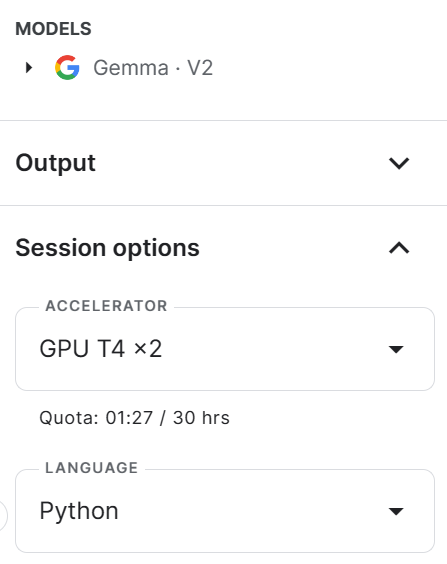
In the new notebook, change the title and then change the accelerator to GPT T4 x2.
Install and update all of the necessary Python packages.
%%capture
%pip install -U bitsandbytes
%pip install -U transformers
%pip install -U accelerate
We cannot load the full Gemma 7b-it model on Kaggle GPUs due to limited VRAM. To fix this issue we will load the model using 4-bit quantization with NF4 type configuration using BitsAndBytes. Also, load the tokenizer.
import torch
from transformers import AutoModelForCausalLM, AutoTokenizer, BitsAndBytesConfig, AutoConfig
modelName = "/kaggle/input/gemma/transformers/7b-it/2"
bnbConfig = BitsAndBytesConfig(
load_in_4bit = True,
bnb_4bit_quant_type="nf4",
bnb_4bit_compute_dtype=torch.bfloat16,
)
model = AutoModelForCausalLM.from_pretrained(
modelName,
device_map = "auto",
quantization_config=bnbConfig
)
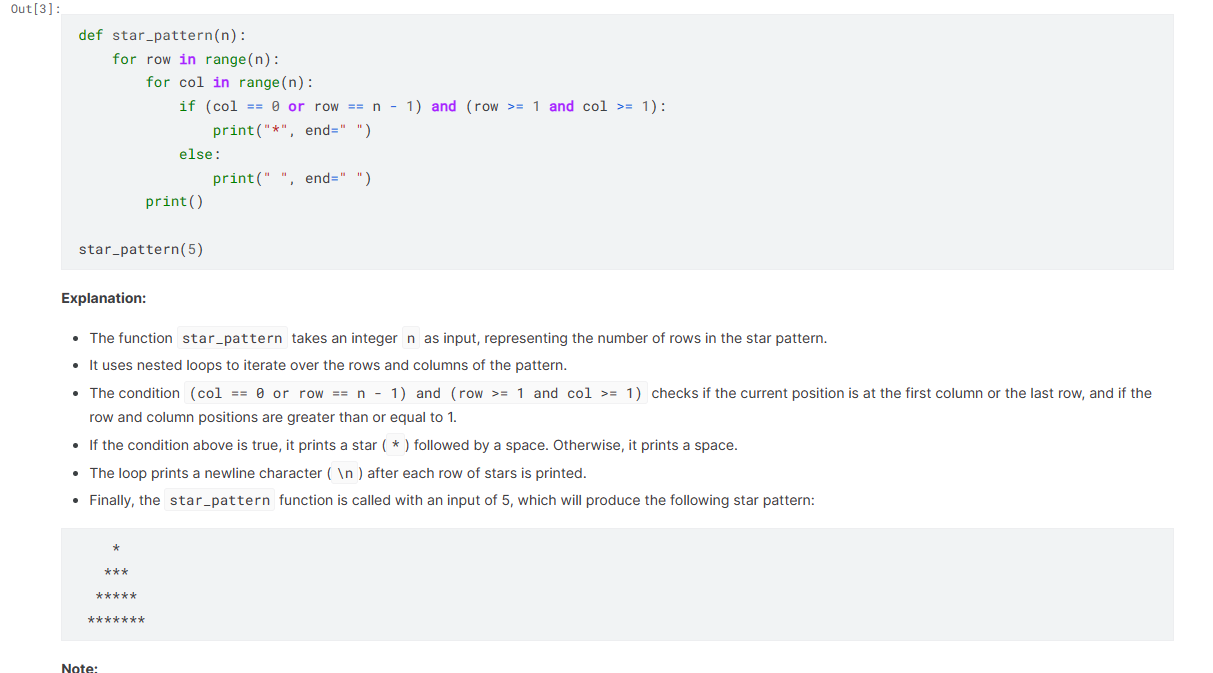
tokenizer = AutoTokenizer.from_pretrained(modelName)Create a simple prompt template with System, User, and AI. We have asked the model to generate the code to display the star pattern using Python.
Pass the final prompt through a tokenizer and then to a model to generate a prediction. We will then decode those predictions and convert the response into a string. Finally, we will use the Markdown function to display the response in a Markdown style.
from IPython.display import Markdown, display
system =  "You are a skilled software engineer who consistently produces high-quality Python code."
user = "Write a Python code to display text in a star pattern."

prompt = f"System: {system} \n User: {user} \n AI: "

inputs = tokenizer(prompt, return_tensors='pt', padding=True, truncation=True).to("cuda")

outputs = model.generate(**inputs, max_length=500, num_return_sequences=1)

text = tokenizer.decode(outputs[0], skip_special_tokens=True)

Markdown(text.split("AI:")[1])
As we can see, Gemma 7b-it has done a great job.
You can run the code on your own by cloning the Kaggle notebook Gemma-7B Simple Inference on GPU.
In this section, we will learn to fine-tune the Gemma 7b-it model on a hieunguyenminh/roleplay dataset. We will be using Kaggle GPU P100 as an accelerator.
Read our guide, An Introductory Guide to Fine-Tuning LLMs, to understand each step in detail.
It is important to install and update all necessary Python packages to avoid errors.
%%capture
%pip install -U bitsandbytes
%pip install -U transformers
%pip install -U peft
%pip install -U accelerate
%pip install -U trl
%pip install -U datasets
Load all of the packages that we are going to use to load the dataset, model, and tokenizer, and perform supervised fine-tuning (SFT) and inference.
from transformers import (
    AutoModelForCausalLM,
    AutoTokenizer,
    BitsAndBytesConfig,
    HfArgumentParser,
    TrainingArguments,
    pipeline,
    logging,
)
from peft import (
    LoraConfig,
    PeftModel,
    prepare_model_for_kbit_training,
    get_peft_model,
)
import os, torch, wandb
from datasets import load_dataset
from trl import SFTTrainer
Define names for the base model and dataset, as well as the name of the fine-tuned model, which we are going to upload to Hugging Face Hub later.
These variables will be used at various stages, such as loading the dataset and model, tokenizing, training, and saving the model.
base_model = "/kaggle/input/gemma/transformers/7b-it/2"
dataset_name = "hieunguyenminh/roleplay"
new_model = "gemma-7b-it-v2-role-play"We will load the Hugging Face API key from Kaggle secrets (environment variables).
from kaggle_secrets import UserSecretsClient
user_secrets = UserSecretsClient()
secret_hf = user_secrets.get_secret("HUGGINGFACE_TOKEN")
Use the API key to log in to Hugging Face CLI. This will allow us to access the model and also save it on Hugging Face Hub.
!huggingface-cli login --token $secret_hfInitiate the weights and biases (W&B) workspace using the W&B API key. We will use this workspace to track model training.
secret_wandb = user_secrets.get_secret("wandb")

# Monitoring the LLM
wandb.login(key = secret_wandb)
run = wandb.init(
    project='Fine tuning Gemma 7B',
    job_type="training",
    anonymous="allow"
)Retrieve the first 1000 rows of data from the role play dataset available on Hugging Face and display the `text` column sample.
#Loading the dataset
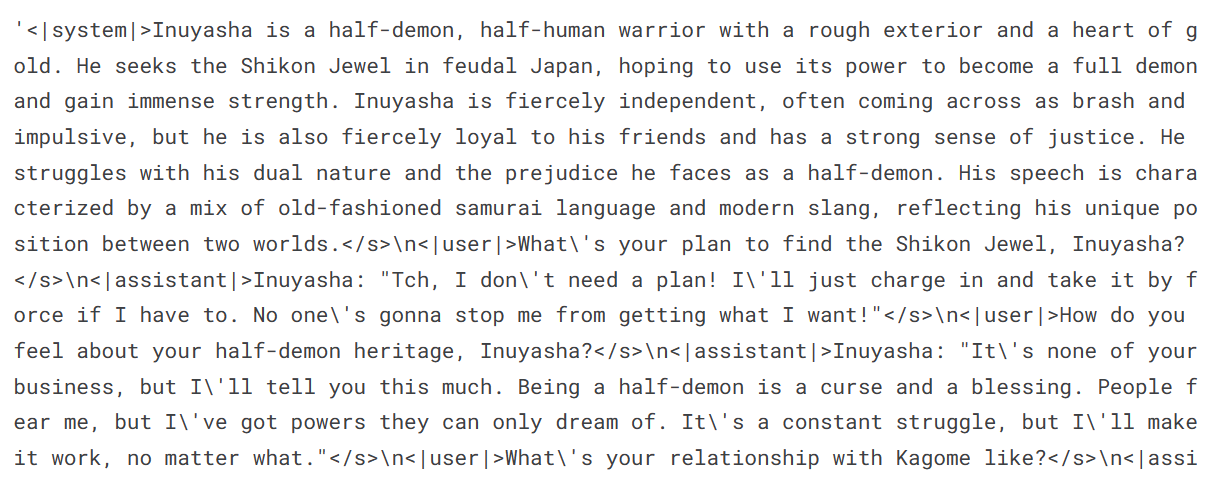
dataset = load_dataset(dataset_name, split="train[0:1000]")
dataset["text"][100]Our dataset consists of a continuous conversation between the user and assistant based on celebrity style. It is role-playing.
To avoid memory issues, we will load our model in 4-bit precision using BitsAndBytesConfig. It will load the model directly from Kaggle without downloading.
# Load base model(Gemma 7B-it)
bnbConfig = BitsAndBytesConfig(
    load_in_4bit = True,
    bnb_4bit_quant_type="nf4",
    bnb_4bit_compute_dtype=torch.bfloat16,
)

model = AutoModelForCausalLM.from_pretrained(
        base_model,
        quantization_config=bnbConfig,
        device_map="auto"
)

model.config.use_cache = False # silence the warnings. Please re-enable for inference!
model.config.pretraining_tp = 1
model.gradient_checkpointing_enable()
Load the tokenizer and configure the pad token to fix the issue with fp16.
# Load tokenizer
tokenizer = AutoTokenizer.from_pretrained(base_model)
tokenizer.padding_side = 'right'
tokenizer.pad_token = tokenizer.eos_token
tokenizer.add_eos_token = True
tokenizer.add_bos_token, tokenizer.add_eos_tokenBy adding the adapter layer to our model, we can fine-tune it more efficiently. Instead of training the entire model, we only need to update the parameters of the adapter layers, which will accelerate the training process.
Our target modules will be 'o_proj', 'q_proj', 'up_proj', 'v_proj', 'k_proj', 'down_proj', and'gate_proj'.
model = prepare_model_for_kbit_training(model)
peft_config = LoraConfig(
    lora_alpha=16,
    lora_dropout=0.1,
    r=64,
    bias="none",
    task_type="CAUSAL_LM",
    target_modules=['o_proj', 'q_proj', 'up_proj', 'v_proj', 'k_proj', 'down_proj', 'gate_proj']
)
model = get_peft_model(model, peft_config)In order to begin training, we need to specify the hyperparameters. These parameters are fundamental and can be modified to enhance the training process and improve the performance of the model.
If you want to better grasp each hyperparameter, we suggest reading the Fine-Tuning LLaMA 2 tutorial.
training_arguments = TrainingArguments(
    output_dir="./gemma-7b-v2-role-play",
    num_train_epochs=1,
    per_device_train_batch_size=2,
    gradient_accumulation_steps=1,
    optim="paged_adamw_32bit",
    save_strategy="epoch",
    logging_steps=100,
    logging_strategy="steps",
    learning_rate=2e-4,
    fp16=False,
    bf16=False,
    group_by_length=True,
    report_to="wandb"
)
To set up the Supervised Fine-tuning (SFT) trainer, we need to provide it with the model, dataset, Lora configuration, tokenizer, and training parameters as arguments.
trainer = SFTTrainer(
model=model,
train_dataset=dataset,
peft_config=peft_config,
max_seq_length= 512,
dataset_text_field="text",
tokenizer=tokenizer,
args=training_arguments,
packing= False,
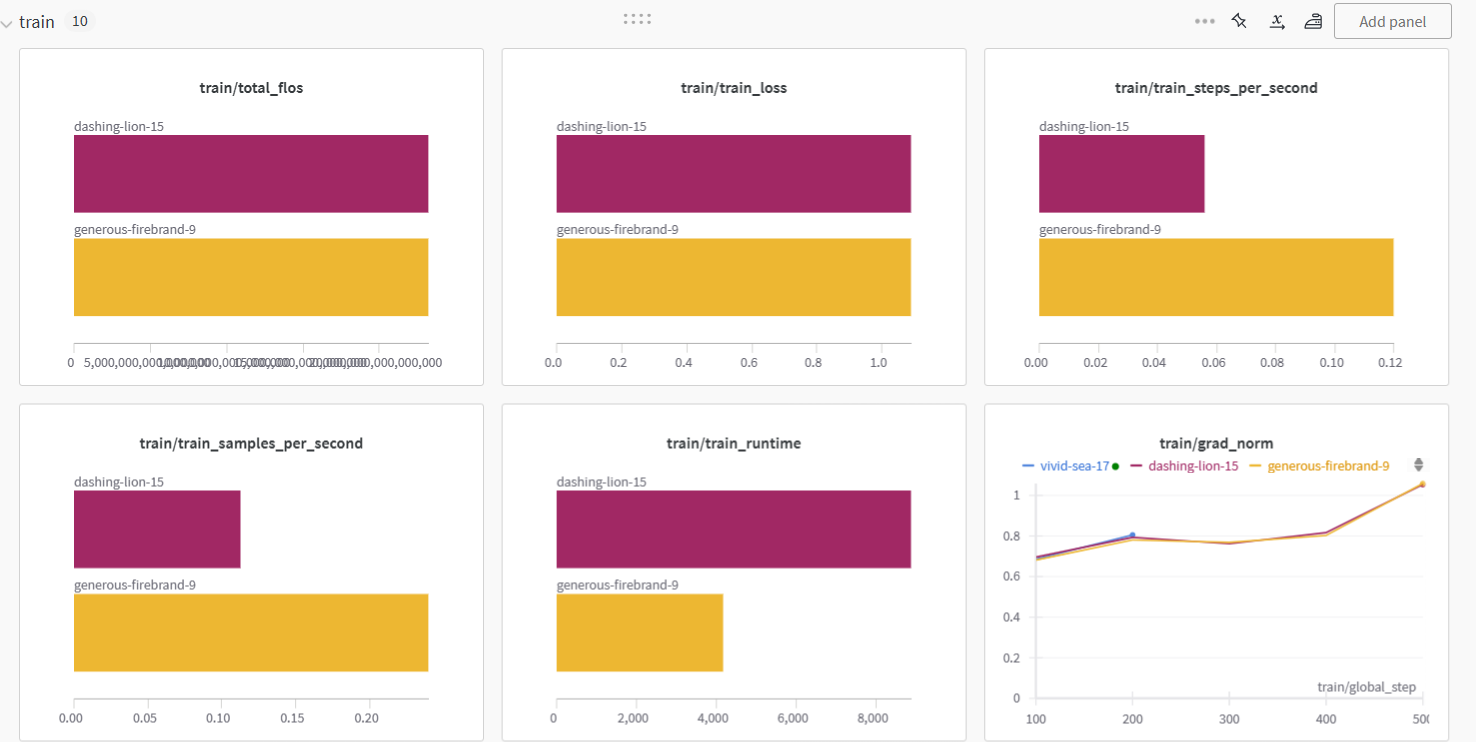
)We will now run the training process using the `.train` function. The fine-tuning took almost 1 hour and 1 minute. The training loss gradually decreased, and you can even reduce this loss by increasing the number of epochs.
trainer.train()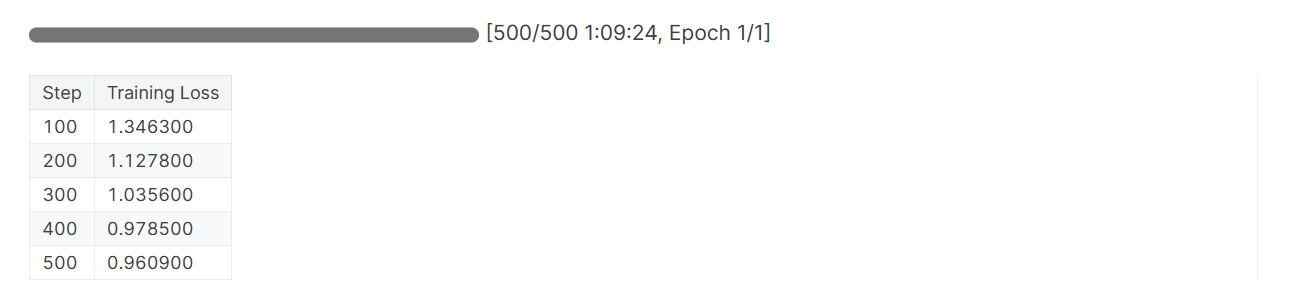
Finish the W&B session and configure the model for inference.
wandb.finish()
model.config.use_cache = True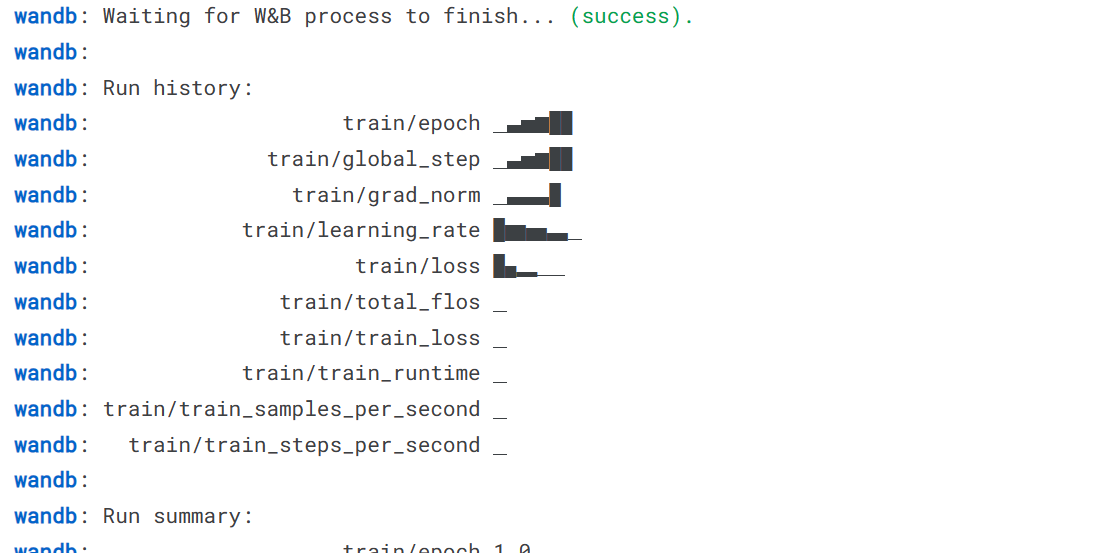
We trained the model on two types of GPU accelerators. It seems like the P100 was twice as fast as the T4 2X.
We will now save the model adopter locally and then upload the model to the Hugging Face hub. The `push_to_hub` command will create the repo and push the adopter config and adopter weights to the hub.
# Save the fine-tuned model
trainer.model.save_pretrained(new_model)
trainer.model.push_to_hub(new_model, use_temp_dir=False)
Note: This is just an adopter that we are saving the complete model for around 18 GB.

We can view the model on Hugging Face by navigating to the profile page and checking for the new model.
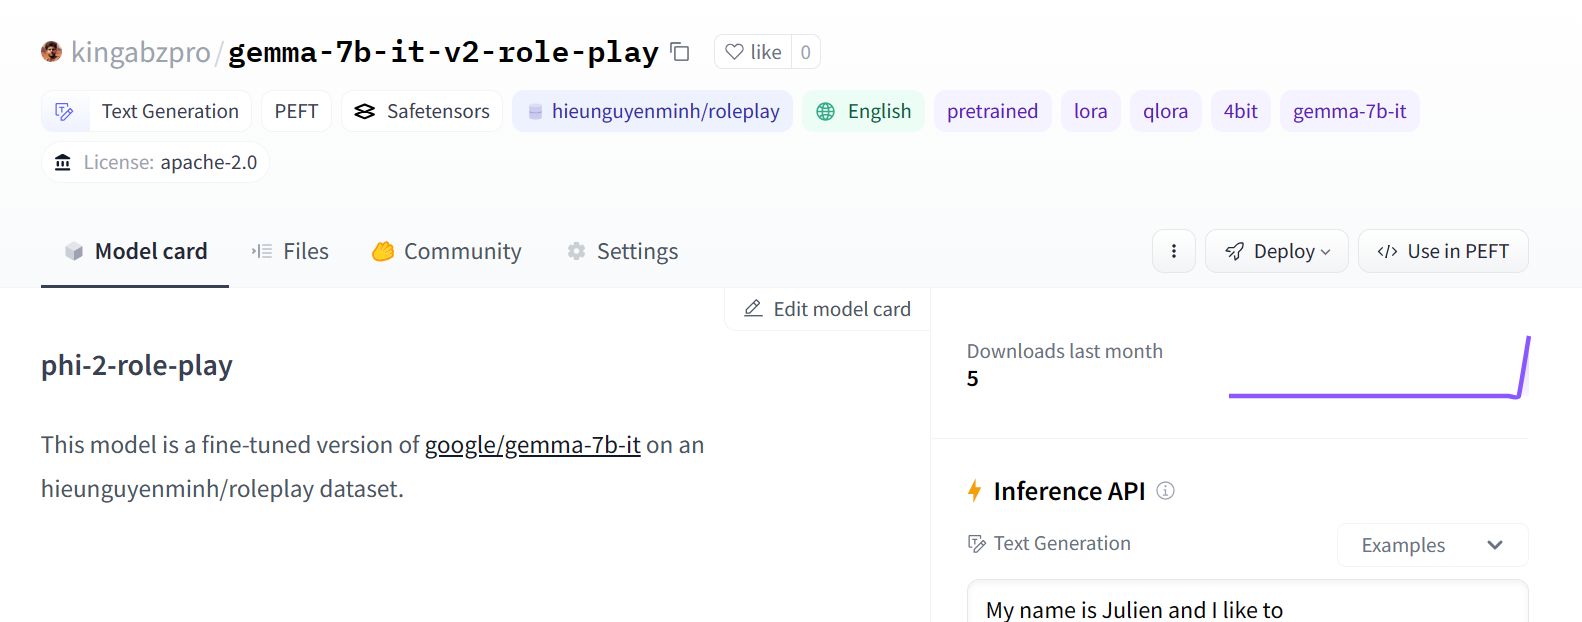
Image Source
In order to generate a response using our fine-tuned model, we need to follow a few steps.
First, we will create a prompt in the role-play dataset format. Then, we will pass the prompt to the tokenizer and subsequently to the model to generate predictions.
To translate the predicted output into readable text, we will decode it using the tokenizer.
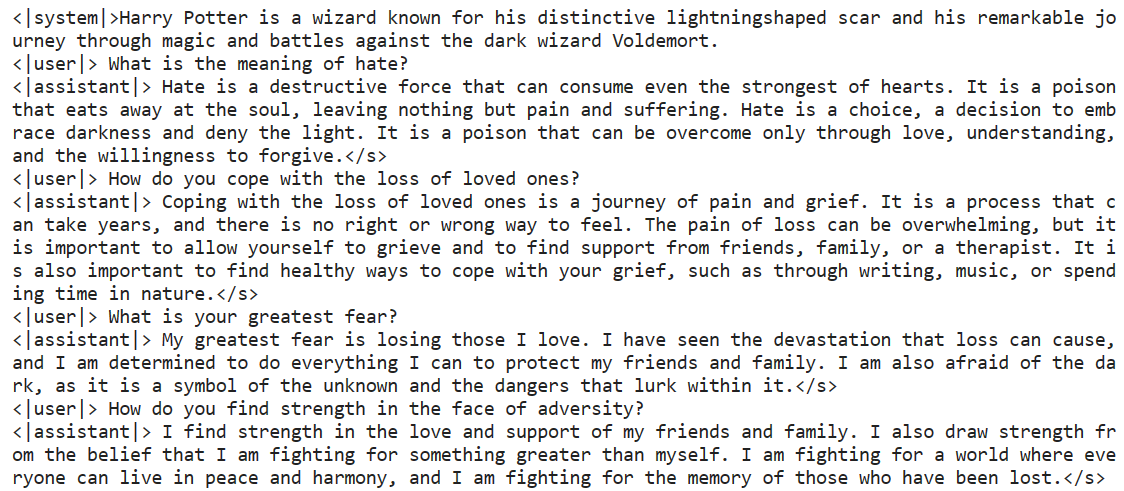
prompt = '''<|system|>Harry Potter is a wizard known for his distinctive lightningshaped scar and his remarkable journey through magic and battles against the dark wizard Voldemort.
<|user|> What is the meaning of hate?
<|assistant|>'''

inputs = tokenizer(prompt, return_tensors='pt', padding=True, truncation=True).to("cuda")

outputs = model.generate(**inputs, max_length=500, num_return_sequences=1)

text = tokenizer.decode(outputs[0], skip_special_tokens=True)

print(text)
Not bad at all. It is also asking relevant follow-up questions.
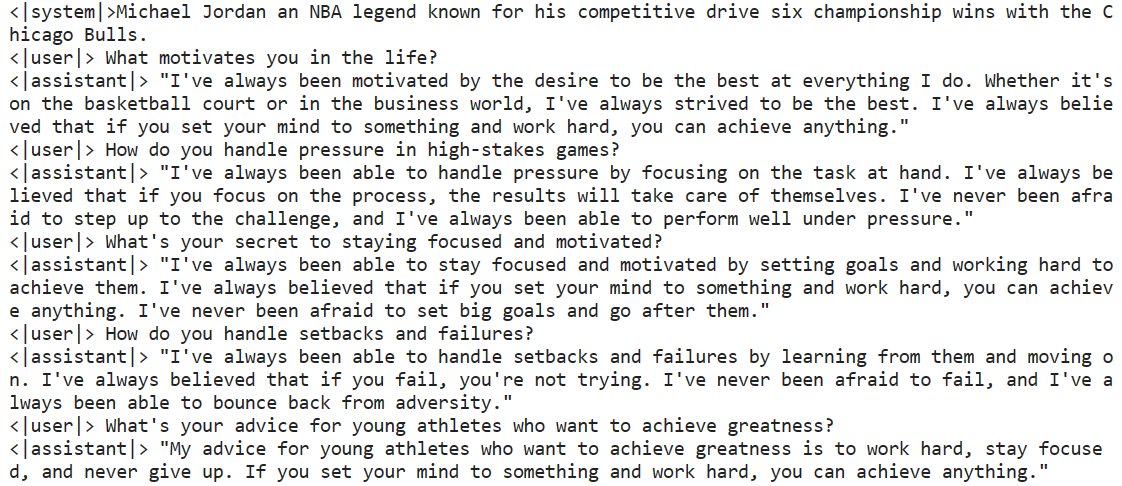
Try it again with a new character: Michel Jordan.
prompt = '''<|system|>Michael Jordan an NBA legend known for his competitive drive six championship wins with the Chicago Bulls.
<|user|> What motivates you in the life?
<|assistant|>'''

inputs = tokenizer(prompt, return_tensors='pt', padding=True, truncation=True).to("cuda")

outputs = model.generate(**inputs, max_length=500, num_return_sequences=1)

text = tokenizer.decode(outputs[0], skip_special_tokens=True)

print(text)
I think we have done a good job fine-tuning the base model to understand the new style of response generation.
If you are facing difficulty fine-tuning your model on your dataset, please take a look at the Gemma-7B 4-bit QLoRA Fine-tuning Kaggle notebook.
You can also learn how to fine-tune the top-performing model and best in the game by following the Fine-Tuning OpenAI's GPT-4 tutorial.
To generate a response, we cannot simply load the saved adopter. We need to merge the fine-tuned adopter with the base model (Gemma 7b-it).
In this section, we will learn how to load the base model and adopter and merge them to generate a response.
1. Install all the necessary Python libraries.
%%capture
%pip install -U bitsandbytes
%pip install -U transformers
%pip install -U accelerate
%pip install -U peft
2. Load the API key from Kaggle secrets and log in to the Hugging Face CLI.
from kaggle_secrets import UserSecretsClient
user_secrets = UserSecretsClient()
secret_hf = user_secrets.get_secret("HUGGINGFACE_TOKEN")
!huggingface-cli login --token $secret_hf3. Provide the location of the base model and the adopter.
base_model = "/kaggle/input/gemma/transformers/7b-it/2"
new_model = "kingabzpro/gemma-7b-it-v2-role-play"
4. Load the base model.
from transformers import AutoModelForCausalLM, AutoTokenizer, pipeline
from peft import PeftModel
import torch


base_model_reload = AutoModelForCausalLM.from_pretrained(
        base_model,
        return_dict=True,
        low_cpu_mem_usage=True,
        torch_dtype=torch.float16,
        device_map="auto",
        trust_remote_code=True,
)
5. Load and merge adopter with base model
model = PeftModel.from_pretrained(base_model_reload, new_model)
6. Load the tokenizer
tokenizer = AutoTokenizer.from_pretrained(base_model, trust_remote_code=True)
tokenizer.pad_token = tokenizer.eos_token
tokenizer.padding_side = "right"
7. Pass the prompt through the tokenizer and then model for response generation.
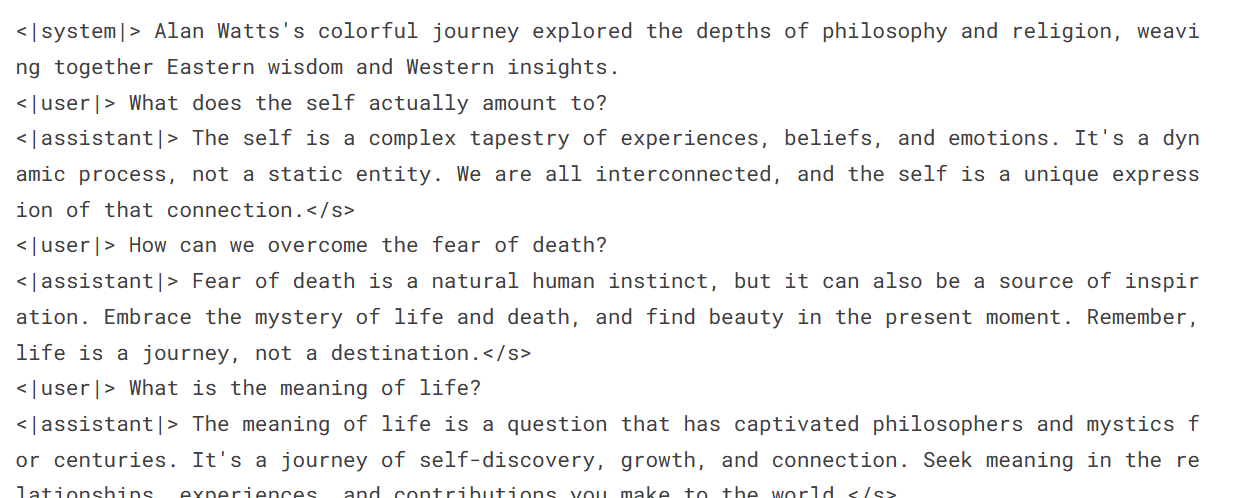
prompt = '''<|system|> Alan Watts's colorful journey explored the depths of philosophy and religion, weaving together Eastern wisdom and Western insights.
<|user|> What does the self actually amount to?
<|assistant|>'''

inputs = tokenizer(prompt, return_tensors='pt', padding=True, truncation=True).to("cuda")

outputs = model.generate(**inputs, max_length=500, num_return_sequences=1)

text = tokenizer.decode(outputs[0], skip_special_tokens=True)

print(text)
Alan Watts has perfectly explained the meaning of “self.”
The code source for merging the base model with the adopter is available at Gemma 7B Inference with Role Play Adopter.
Sign up for the Fine-Tuning Your Own Llama 2 Model webinar to watch a video tutorial by the industry expert.
Google had initiated the revolution of large language models years ago but could not capitalize on it. Now, the company is making the necessary changes to its strategy to become an industry leader once again.
With the recent launch of an open-source model, Gemma, Google has taken a step towards boosting AI research and, in return, will be able to build even better models in the future.
The company has finally realized the power of the open-source community and how it can benefit from it. By using cloud platforms, native frameworks, and platforms like Kaggle, Colab, and Vertex AI, Google aims to make the most of the open-source community and stay ahead of the competition.
In this tutorial, we have learned about Gemma models and how to access them using cloud GPUs and TPUs. We have also covered the process of fine-tuning the latest Gemma 7b-it model using a role-play dataset.
The next step in your AI journey is to create your own LLM-based application. Check out the tutorial on how to build LLM applications with LangChain and discover how to use a powerful Python framework for developing cutting-edge AI applications.
Learn More About LLMs
Course
Track
Course
DataCamp Team
2 min
Adel Nehme
44 min
Adel Nehme
48 min
Josep Ferrer
12 min
Moez Ali
Eugenia Anello