StableDiffusion Web UI: A Comprehensive User Guide for Beginners
Stable Diffusion Web UI (SDUI) is a user-friendly browser interface for the powerful Generative AI model known as Stable Diffusion. This is an advanced AI model capable of generating images from text descriptions or modifying existing images based on textual prompts. The web UI developed by AUTOMATIC1111 provides users with an engaging platform to interact with the Stable Diffusion models without requiring any advanced technical or programming skills.
You can use Web UI locally on a laptop or PC with both CPU and GPU support. Additionally, you have the option to deploy your own model on a server, allowing others to explore and experiment. It supports almost all the operating systems and GPUs, including Nvidia, AMD, and Intel. This revolutionary tool has transformed the way artists create high-quality art on their personal computers, enabling private and accessible AI-powered creativity.
In this tutorial, we will learn how to download and set up SDUI on a laptop with Windows 11 and Nvidia GPU. Once the setup is complete, we will explore the various features available on the Web UI, including extensions and custom stable diffusion models. This guide is suitable for individuals of all backgrounds, including those without technical expertise or teenagers.
Download and Install CUDA for Nvidia GPUs
You can use the Stable Diffusion Web UI without a GPU or CUDA installation. The Web UI is capable of running on the CPU and can provide quick results. However, to obtain faster results, it is highly recommended that you use GPU acceleration if possible.
This guide only focuses on Nvidia GPU users with Windows as an operating system.
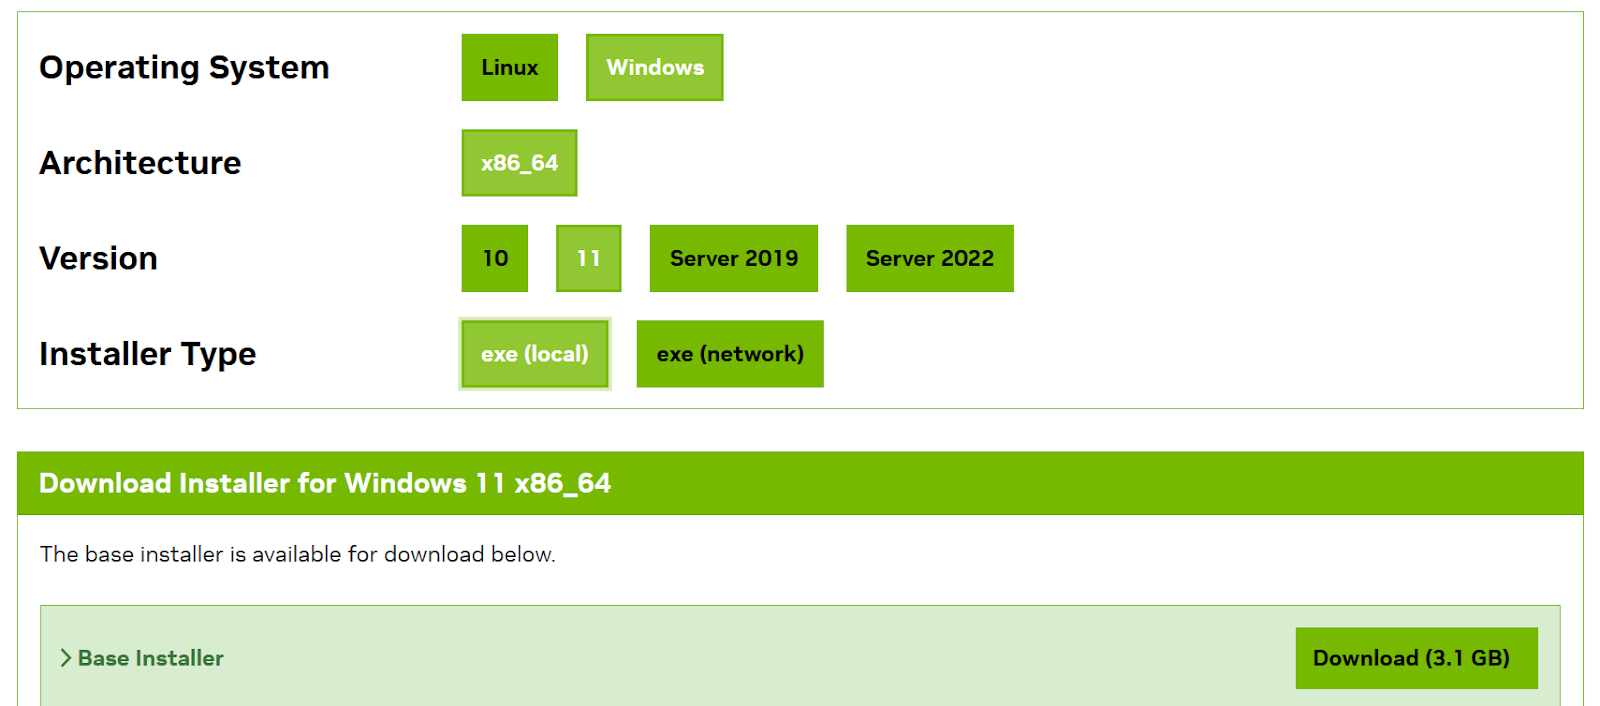
First, download and install the latest version of CUDA Toolkit 12.3. You need to select the correct options based on your OS and download the Base installer.
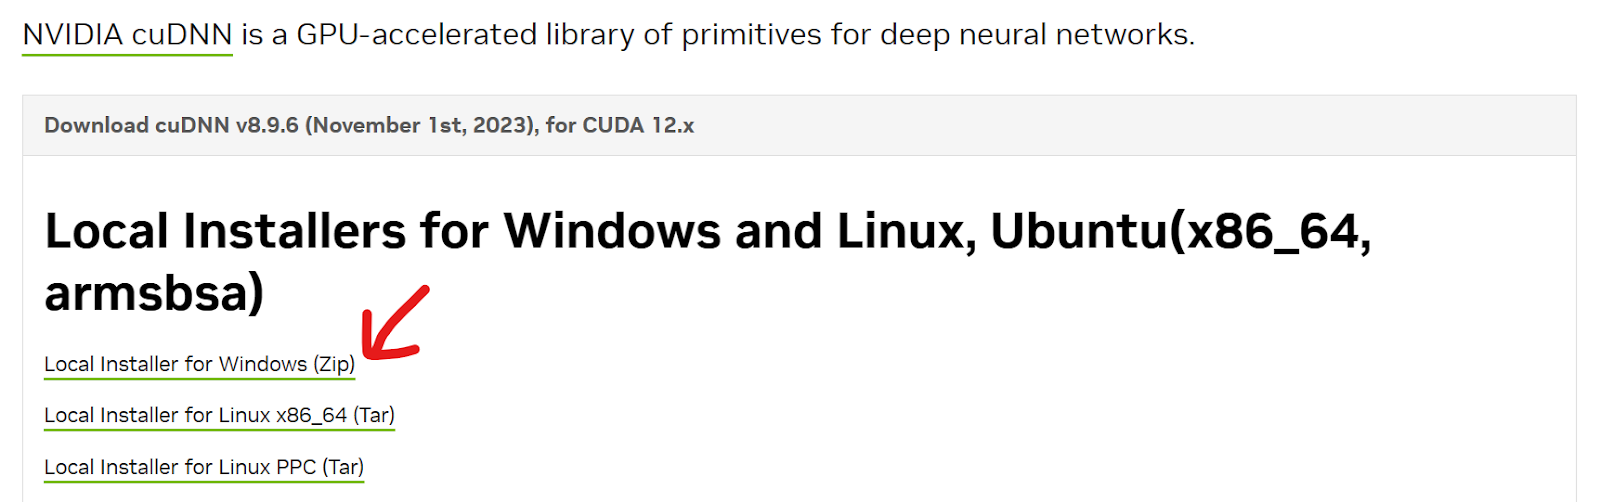
Next, install the latest cuDNN. You can download the zip file from Nvidia cuDNN. Make sure it matches with the correct version of the CUDA Toolkit.
Extract all the folders from the zip file, open it, and move the contents to the CUDA toolkit folder. In this case, the directory is C:\Program Files\NVIDIA GPU Computing Toolkit\CUDA\v12.3; however, it may differ for you. If you come across a prompt asking about duplicate files, select "Replace All."
Note: always ensure that you have the latest Nvidia drivers installed on your computer for optimal performance.
Download and Install the Stable Diffusion Web UI
In this section, we will learn the easiest and most automated way to install SDUI. We will install it using a binary distribution for those who can't install Python and Git.
- Download the
sd.Web UI.zipfile from Release v1.0.0-pre. Although it is an older version, it will automatically update to the latest version during installation. - Extract the contents of the zip file to the location of your choice. For example, you may extract it to
C:\Desktop\Web UI. - To update the Stable Diffusion Web UI, simply double-click on the
update.batfile. - After that, double-click the
run.batbutton to launch Web UI. It will take almost an hour the first time to download the necessary files and the model. - Once it has downloaded and installed all the necessary Python packages and the Stable Diffusion model, you will be redirected to the browser with a local URL "http://127.0.0.1:7860". If the link does not open automatically, simply click on the link provided in the terminal.
Note: The Stable Diffusion Web UI repository provides installation guidelines for other operating systems.
Txt2img Tab Guide
In your default browser, you will see the user interface with multiple options. Let’s try out each one to generate high-quality images.
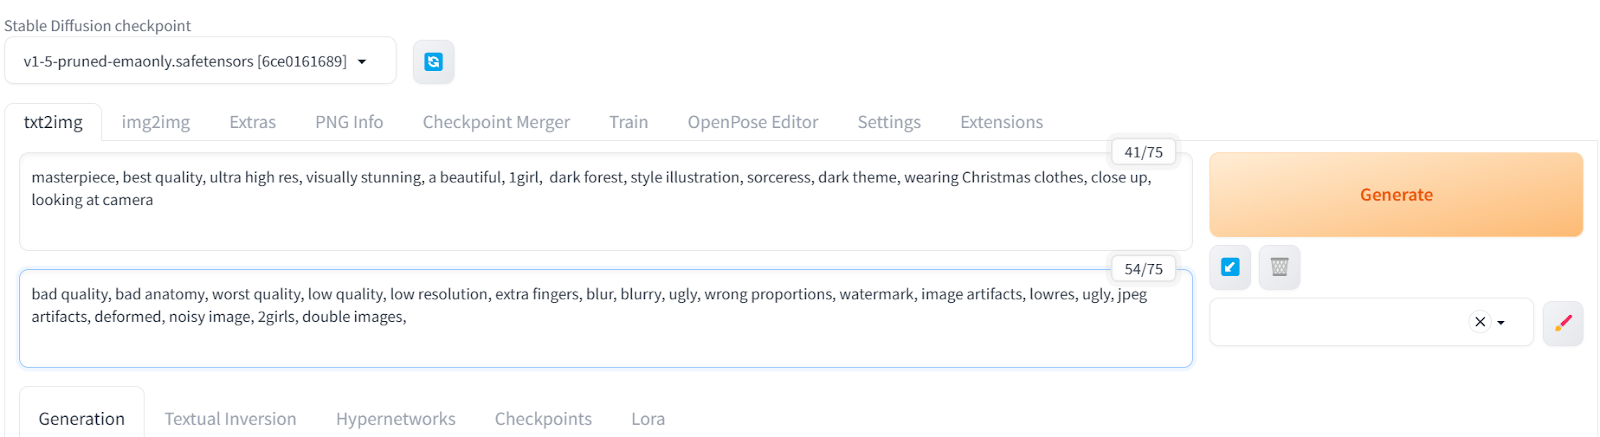
First, we will click on the txt2img tab and type positive and negative prompts to generate an image of a girl in a dark forest wearing Christmas clothes. Additional keywords are added to improve the quality and style of the image.
We will start with a limited negative prompt and keep adding more keywords to eliminate recurring deformities in the image.
Positive prompt: “masterpiece, best quality, ultra high res, visually stunning, a beautiful, 1girl, dark forest, style illustration, sorceress, dark theme, wearing Christmas clothes, close up, looking at camera”
Negative prompt: “bad quality, bad anatomy, worst quality, low quality, low resolution, extra fingers, blur, blurry, ugly, wrong proportions, watermark, image artifacts, lowres, ugly, jpeg artifacts, deformed, noisy image, 2girls, double images,”

Our generated artwork depicts a woman in a dark Christmas setting with exceptional quality.
Let's adjust the advanced settings. We can change the image size and increase the sampling step to add more details.
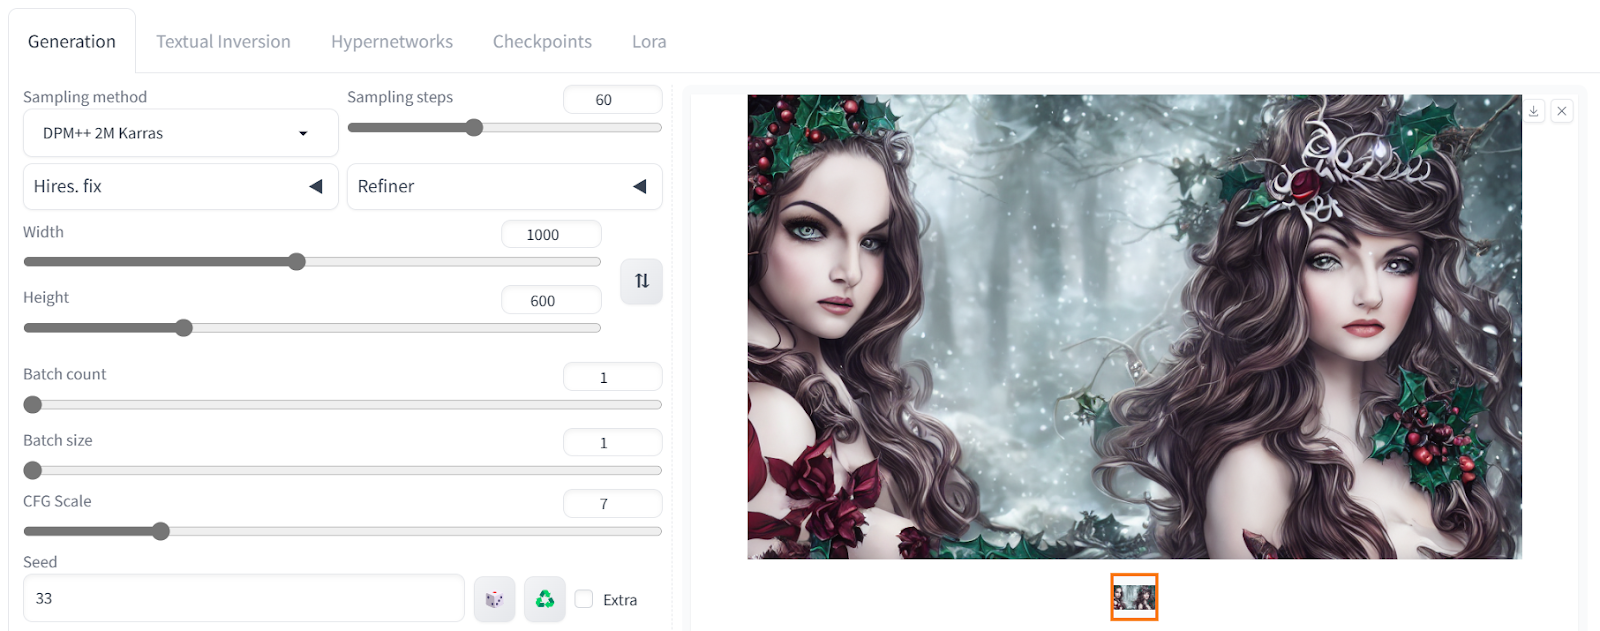
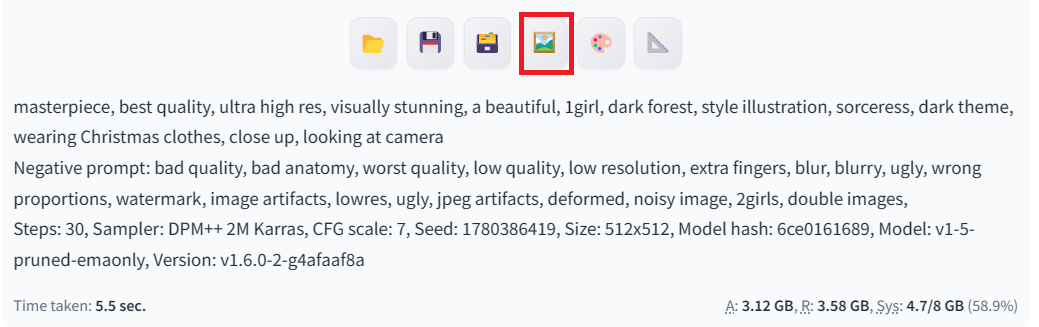
All the generated images come with the metadata that includes positive and negative prompts and advanced settings. You can use it to generate the same result.
We will now move the image to the 'img2img' tab by clicking the photo emoji button beneath the image, as shown above.
If you want to build your own generative AI model from scratch, you can do so by following this guide: Building a Diffuser Model From Scratch with PyTorch.
Img2img Tab Guide
The img2img tab allows you to upload the reference image to generate a similar-looking image using different prompts for different styles. We have included a new positive prompt and kept the negative prompt the same to generate four images with different styles. If you want to generate multiple images with a single prompt, you can do so by adjusting the Batch count in the generation settings.
Positive prompt: “masterpiece, best quality, ultra high res, visually stunning, a beautiful, 1barbie, pink theme, wearing Christmas clothes, close up, looking at camera, 3d, “

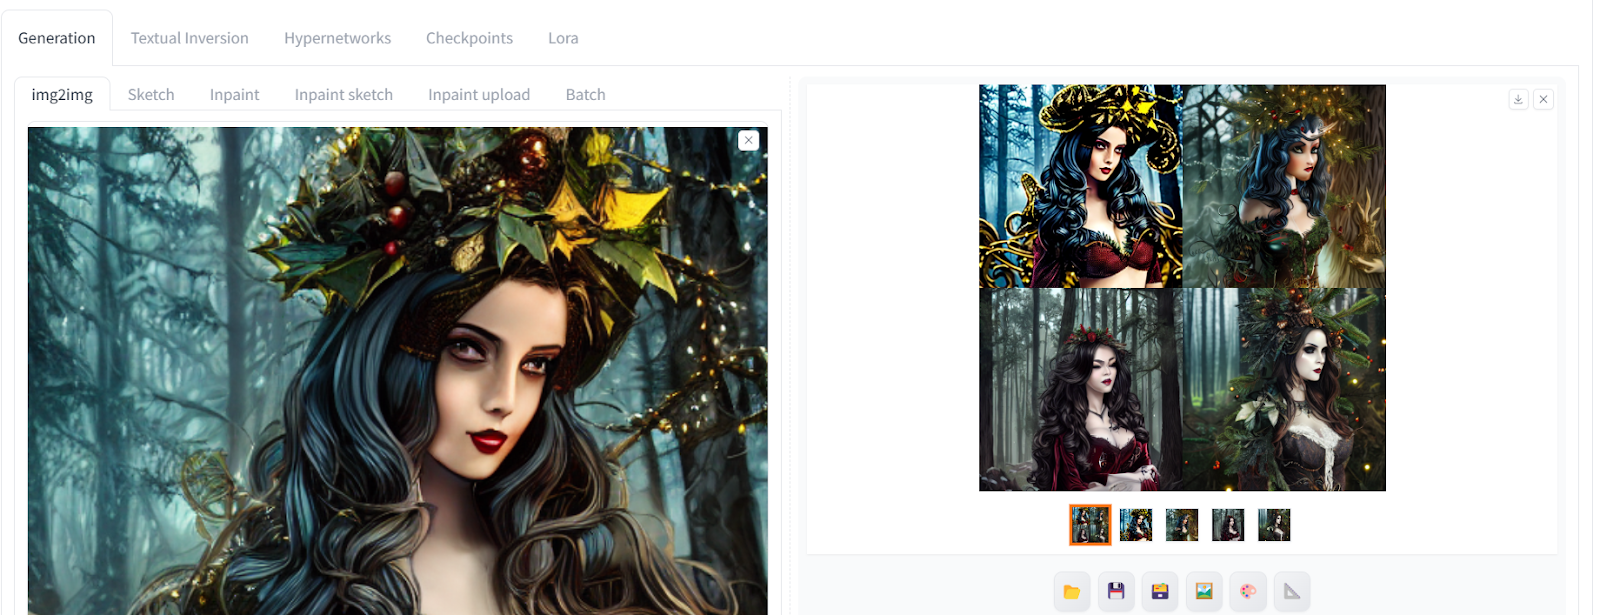
The resulting images look stunning, with different styles and props. Some are without a crown, and some are colorful.
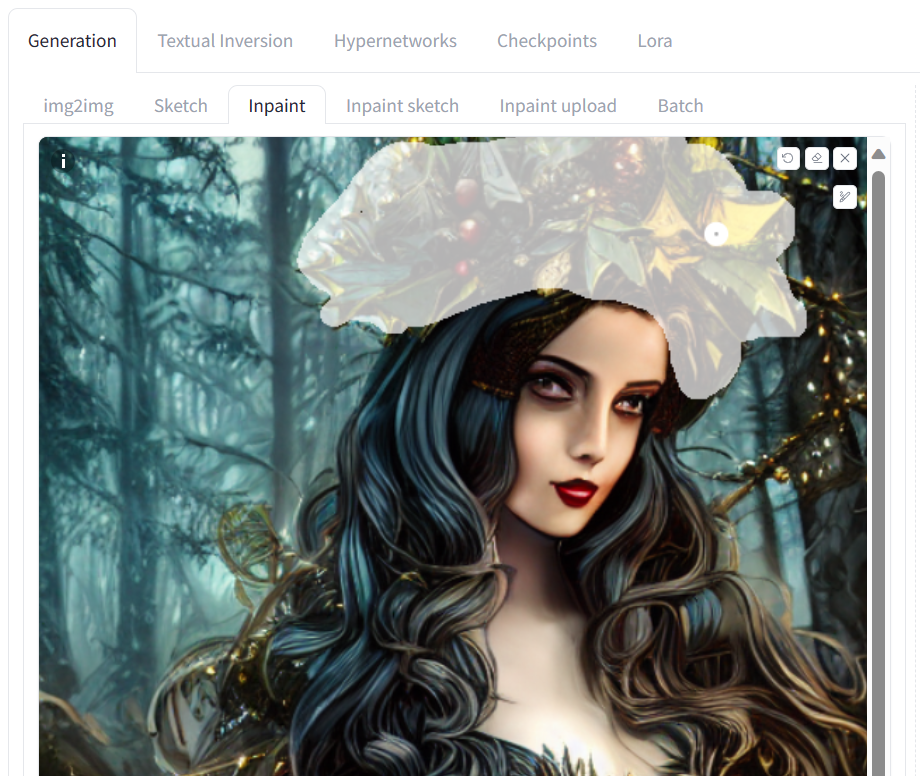
Let's go to the 'Inpaint' tab and try to change the wooden crown in the photo. We can use the inpainting tool to select only the upper head part of the girl and change it into a golden crown. Inpainting enables us to modify only the selected part of the image.
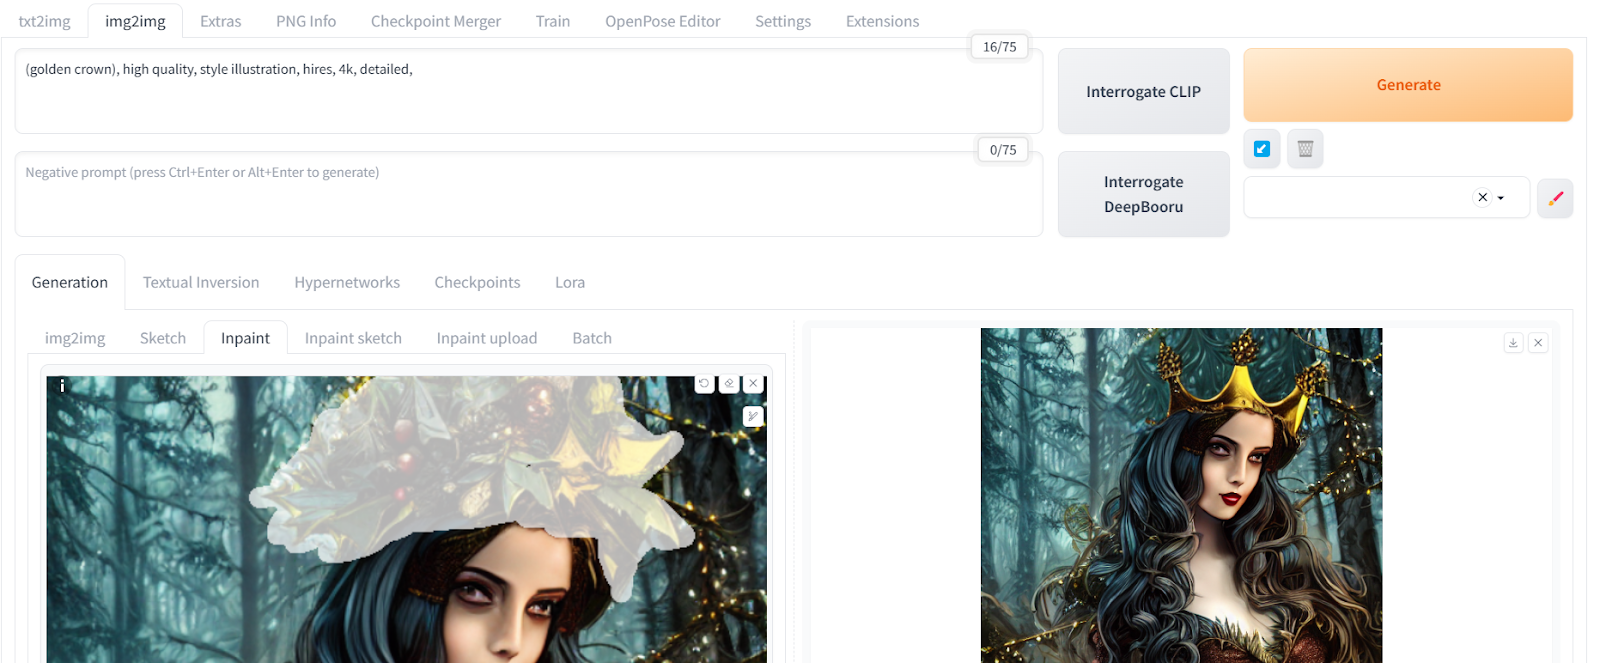
The new golden crown blends seamlessly into the picture without the need for Photoshop. Using a highlighting tool and a simple prompt, we were able to modify a part of the image.
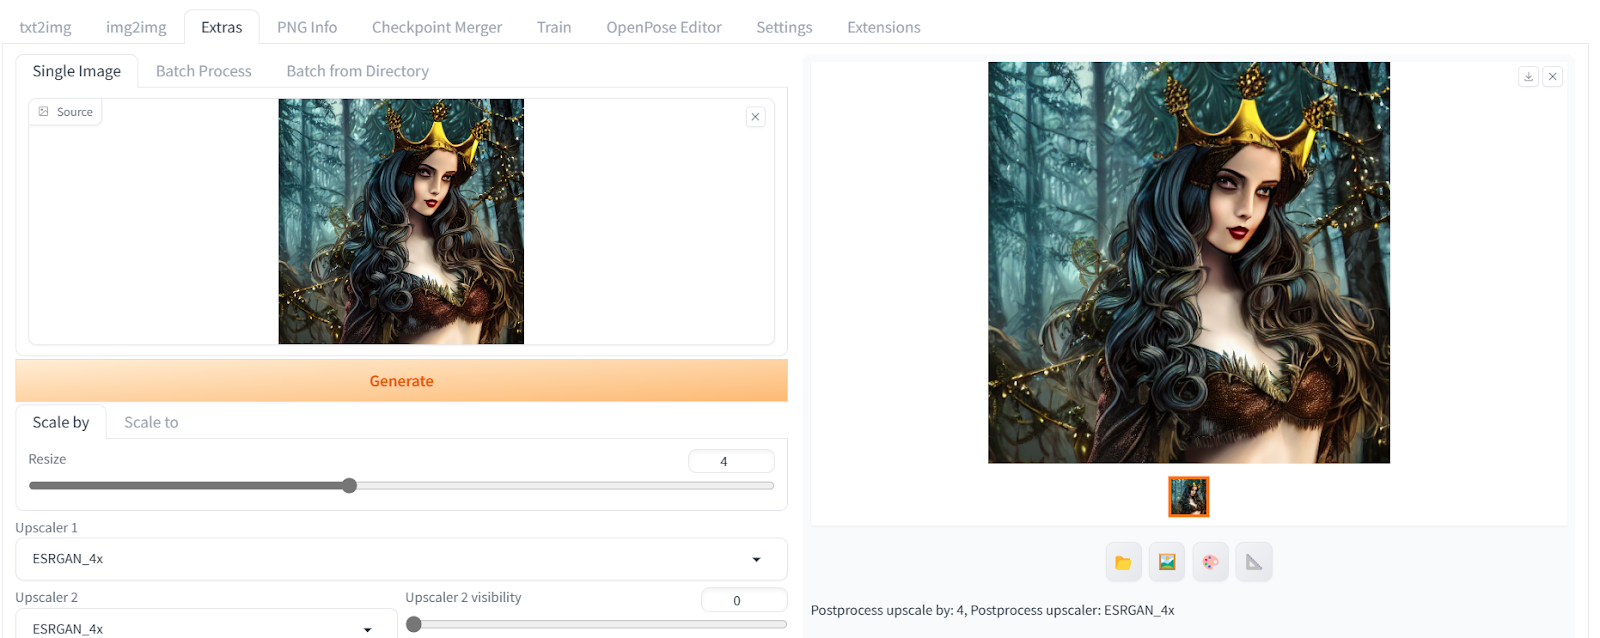
Using Upscaler
To upscale the image that we have generated, we will send the image to the Extras tab. We will scale the image times four and keep everything else the same.
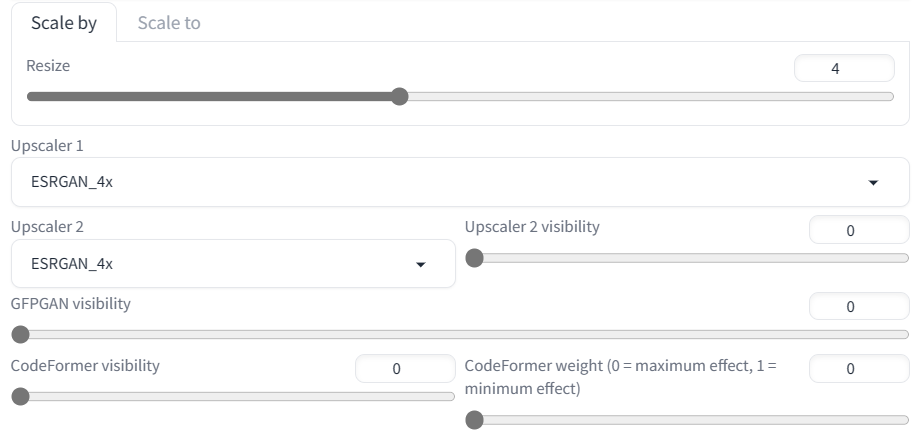
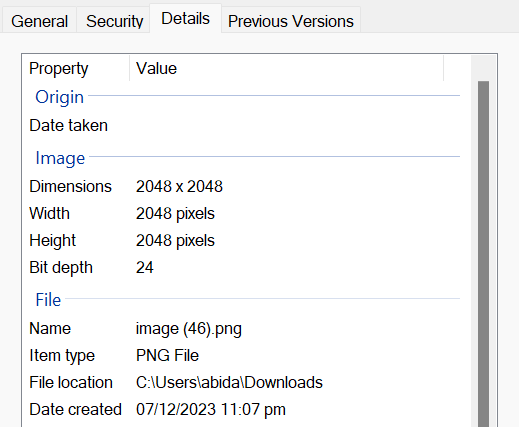
After that, we will click on the Generate button to convert “512X512” to “2048X2048” in a few seconds without the loss of any image quality.
You can check the size of an image by downloading it onto your computer and accessing the image file properties.
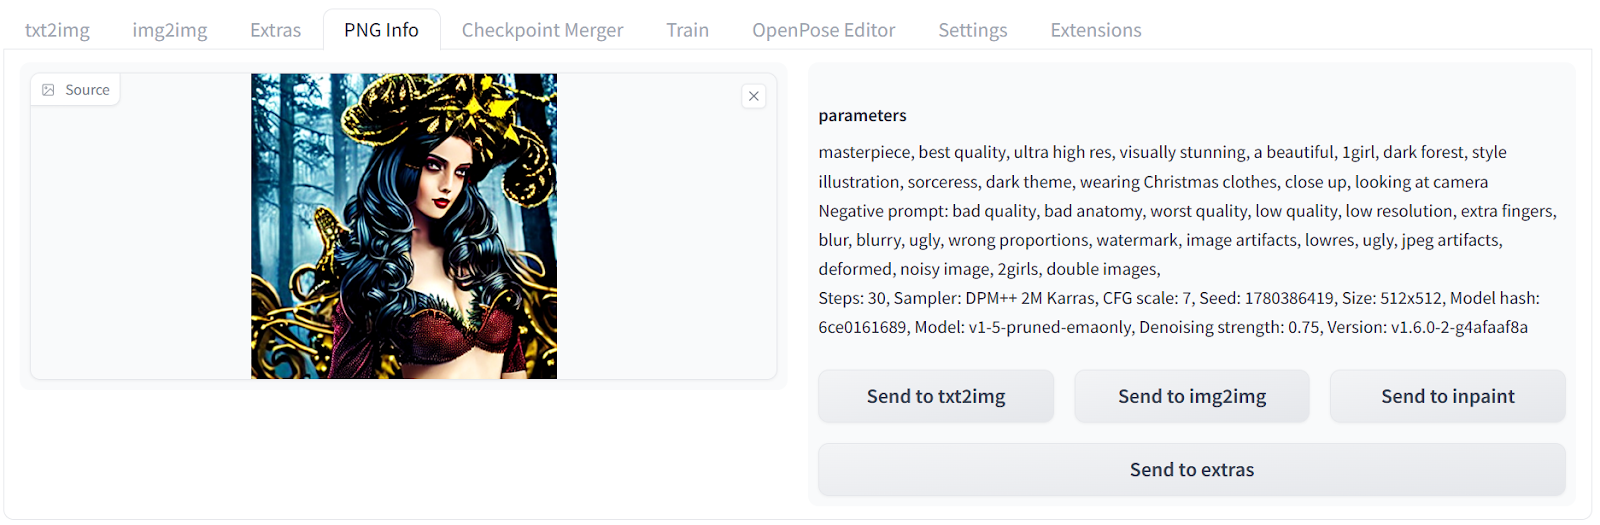
PNG Info
As we have previously learned, every image contains metadata that indicates how it was generated. If you want to view information on a previously generated image, you can upload it to the "PNG Info" tab. From there, you can view positive and negative prompts, as well as advanced settings.
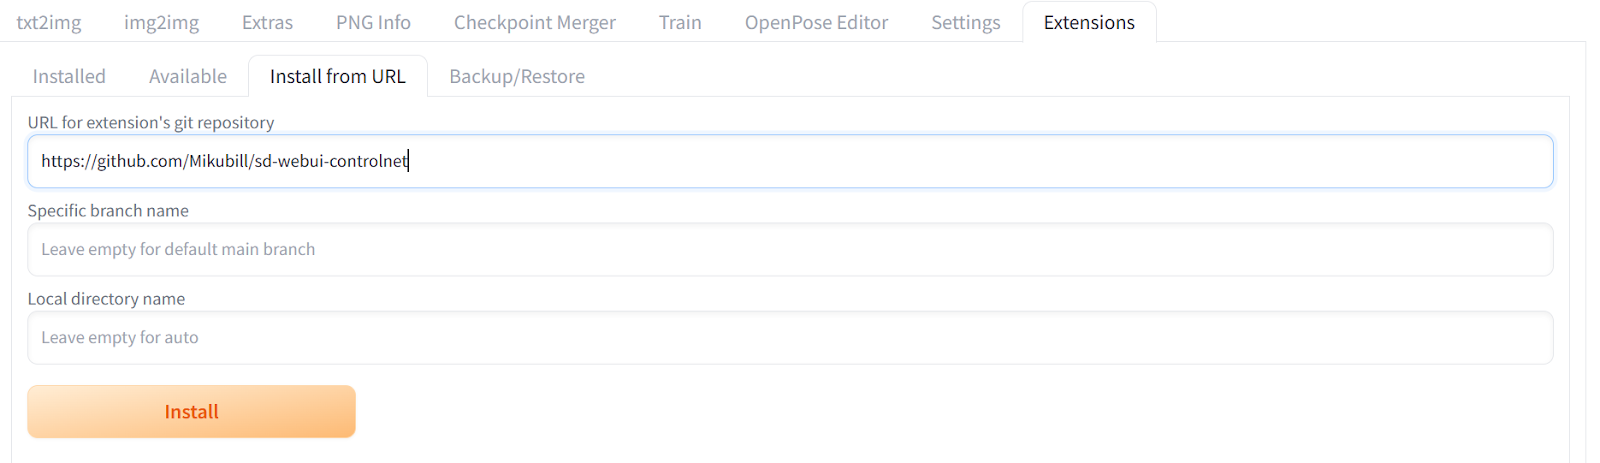
Installing Extensions
To install the extensions into the Web UI, you have to switch to the Extensions tab and click on the install from URL tab. After that, add the URL to the repository for the extensions. In our case, we are installing the ControNet extension using https://github.com/Mikubill/sd-Web UI-controlnet. ControNet is a neural network architecture that can be used to control diffusion models by providing extra conditions.
- Then, we will install the OpenPose Editor extension using the Github URL:
https://github.com/fkunn1326/openpose-editorand press Install. - Download the OpenPose model from the Hugging Face repository:
hf.co/lllyasviel/ControlNet-v1-1/tree/main. Make sure to download the “control_v11p_sd15_openpose.pth” file. - Move the model file in the the Stable Diffusion Web UI directory:
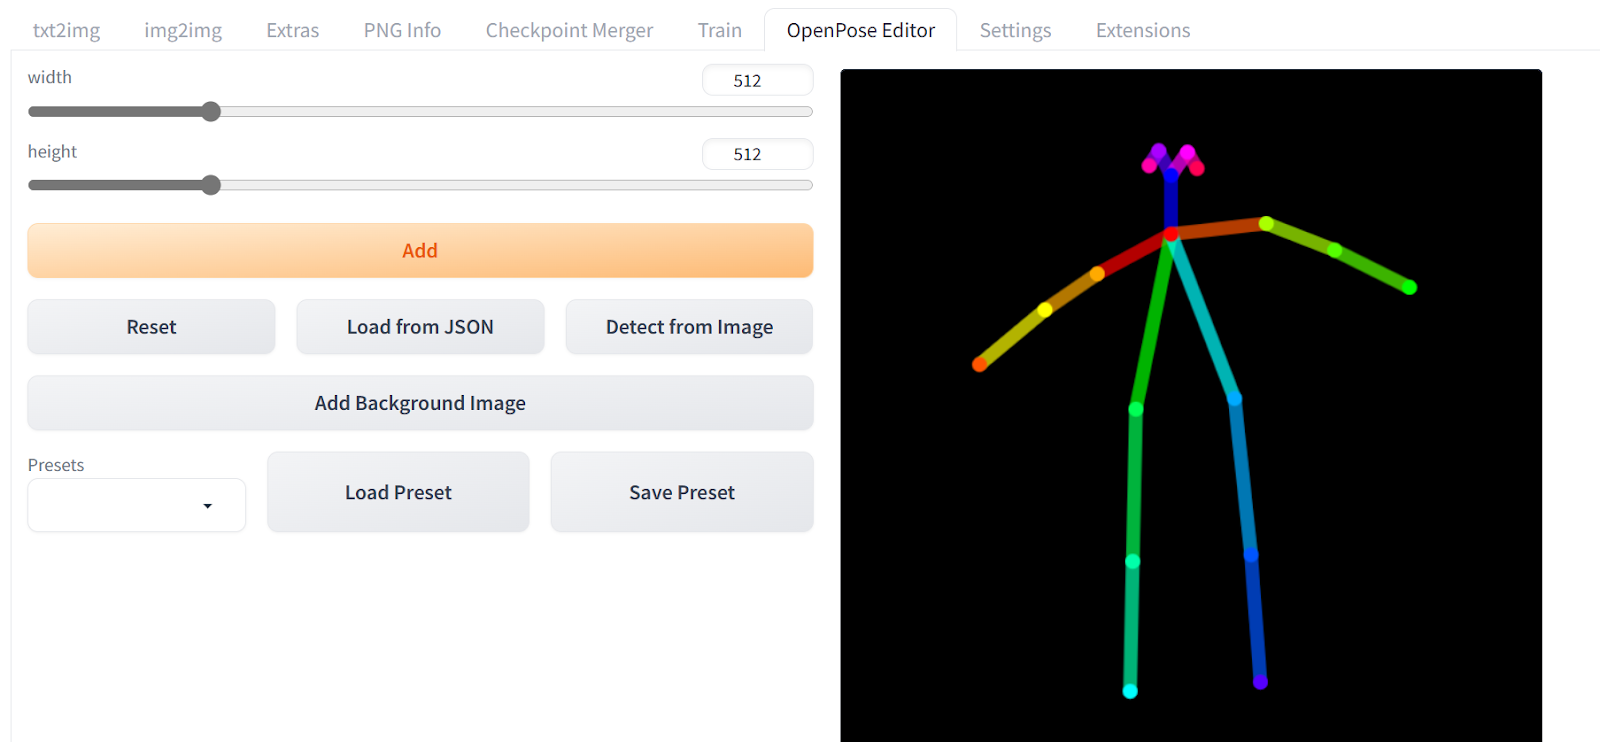
stable-diffusion-Web UI\extensions\sd-Web UI-controlnet\models - After successful install the extension, you will have access to the
OpenPose Editor. - Change the pose of the stick figure using the mouse, and when you are done click on “Send to txt2img”.
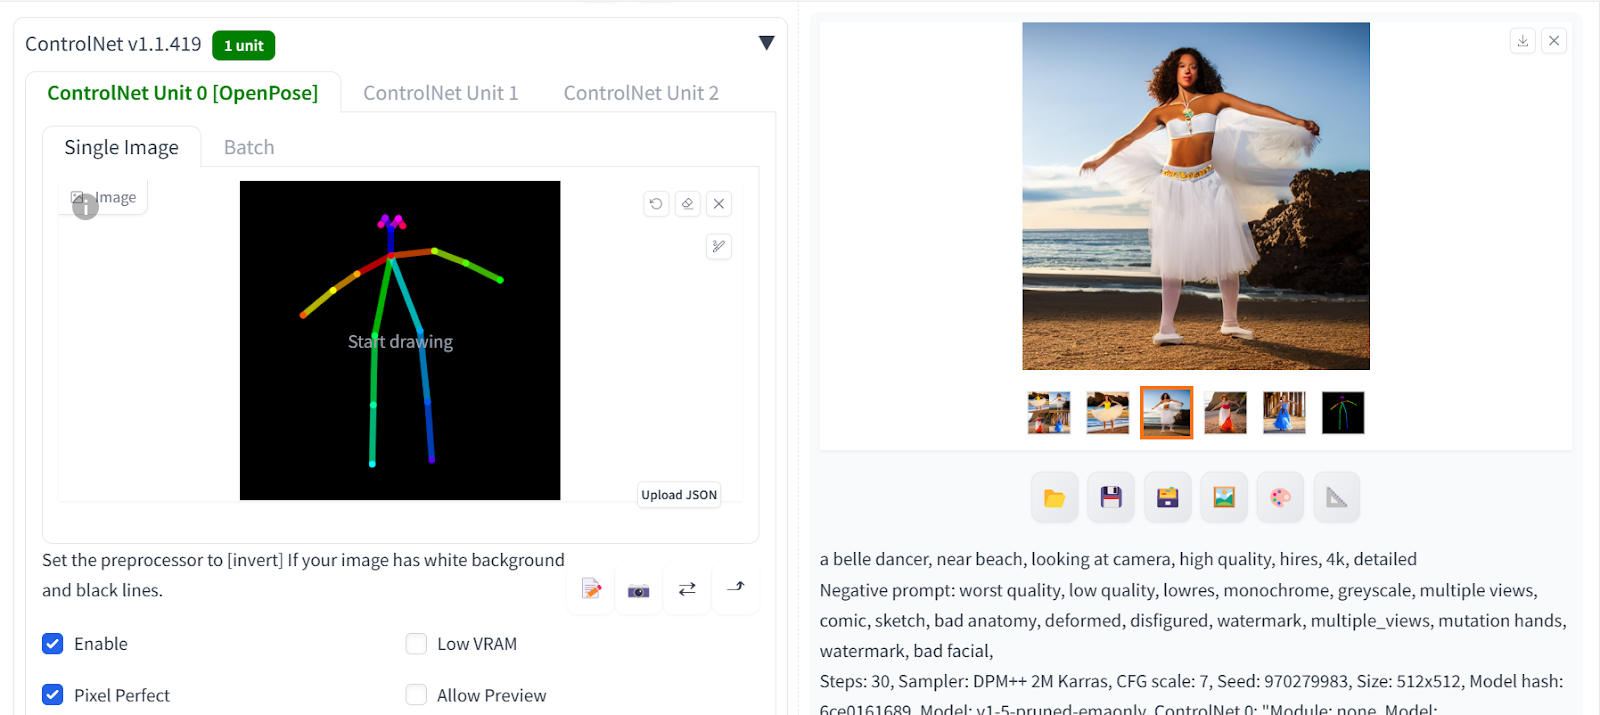
Scroll down and open the ControlNet panel. Select Enable, Pixel Perfect, and OpenPose option.
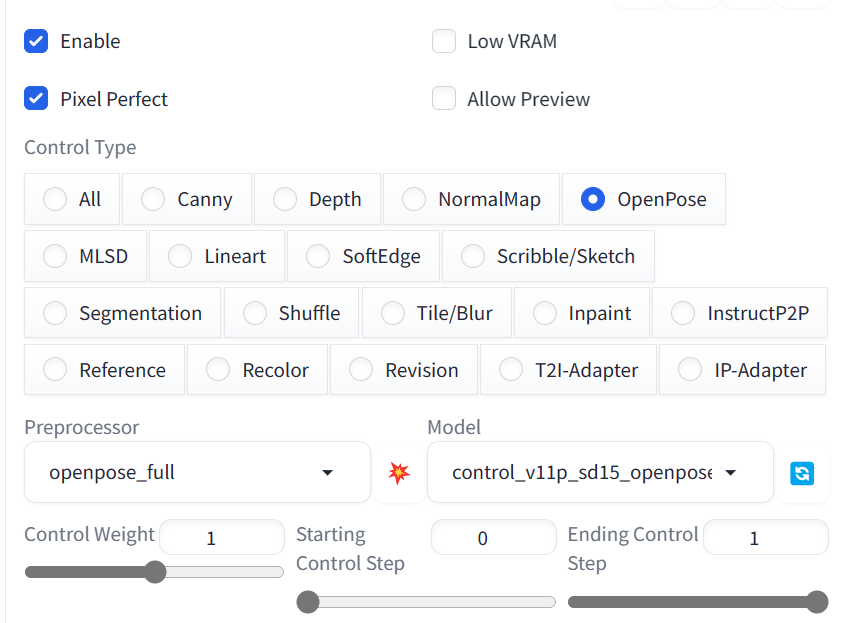
After that, scroll up and write a positive and negative prompt to generate four images with similar poses.
Positive prompt: “a belle dancer, near beach, looking at camera, high quality, hires, 4k, detailed “
Negative prompt: “worst quality, low quality, lowres, monochrome, greyscale, multiple views, comic, sketch, bad anatomy, deformed, disfigured, watermark, multiple_views, mutation hands, watermark, bad facial,”
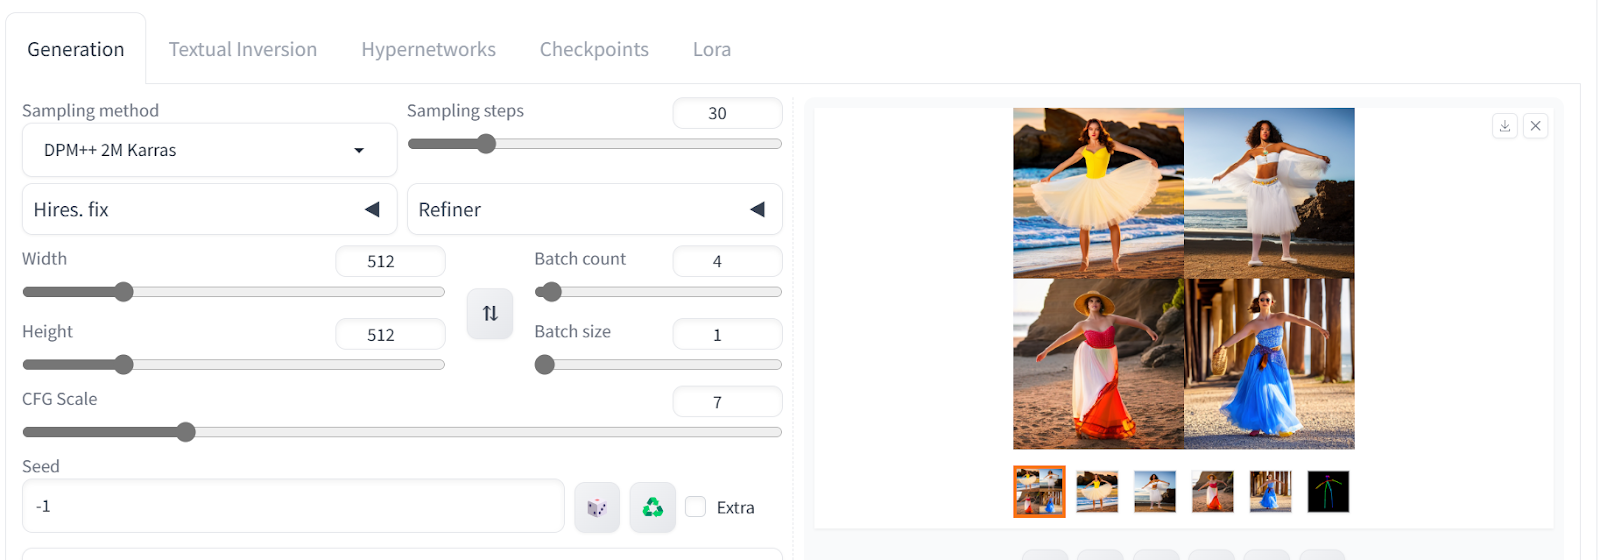
We have four images of women in the same pose. Click on any image to view them as a single image.
Using Custom Models
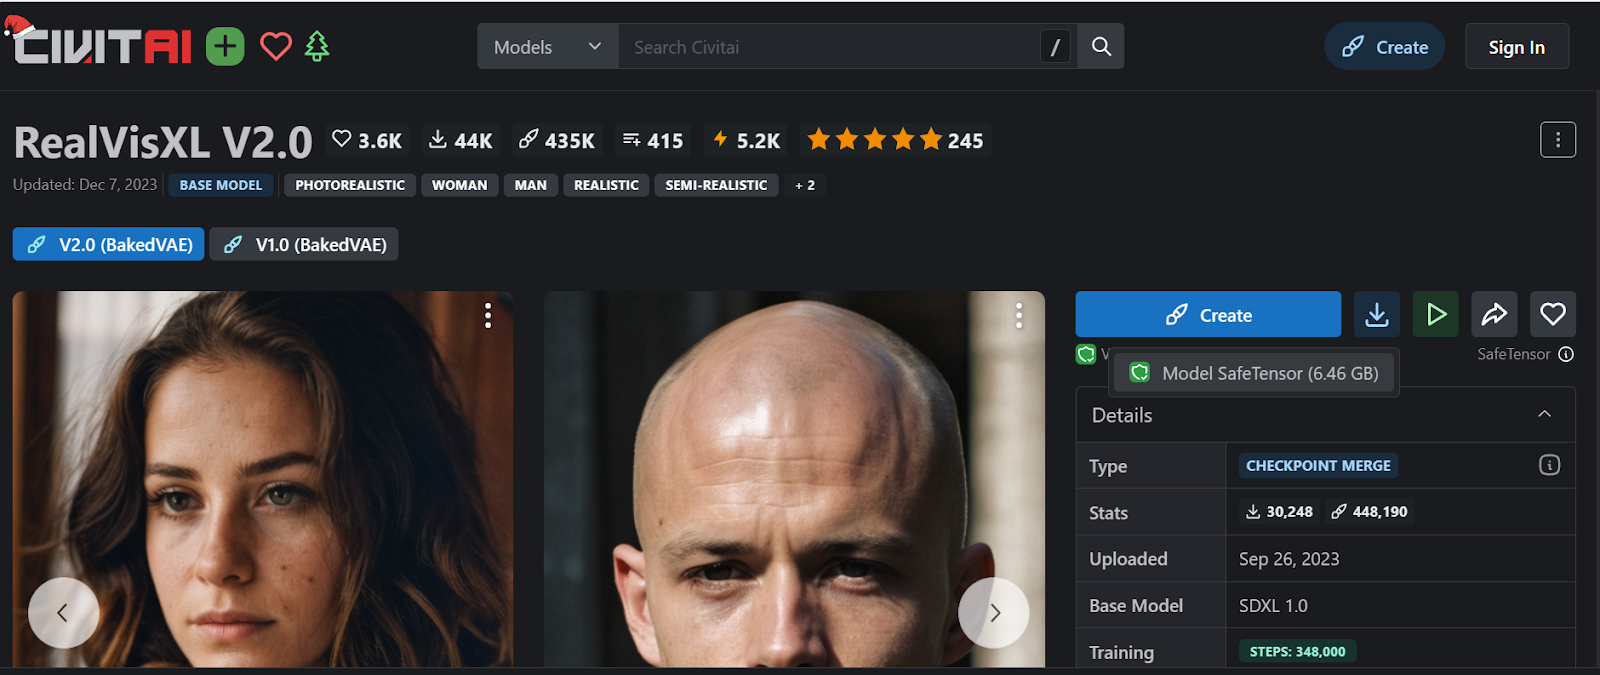
In this section, we will download and load the custom model that was fine-tuned on high-quality portraits to generate highly realistic images. The CivitAI is a platform of various open-source custom image generation models. You can easily search for a specific model and download it without even creating an account.
You can fine-tune the Stable Diffusion model by following the Fine-tuning Stable Diffusion XL with DreamBooth and LoRA guide. The guide provides simple steps to fine-tune the model on Kaggle using free GPU access.
In our case, we will download the RealVisXL V2.0 model by searching for it on the website and clicking the download button in the right panel.
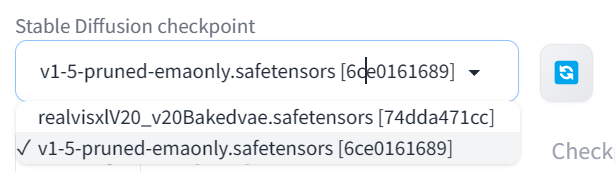
After downloading the model, move it to the Stable Diffusion Web UI model directory located at C:\Desktop\Web UI\Web UI\models\Stable-diffusion.
Click the refresh button on the top left, then select the newer RealVisXL model from the drop-down panel to activate the model.
Note: If you're using a CPU-accelerated machine, generating a single image could take up to 5 minutes. Therefore, ensure that you're running the Web UI on a GPU machine.
To access both positive and negative prompts optimized for the ReallVisXL model, simply scroll down the mode page and click on the desired image. These images come with metadata that can be used to generate realistic images. For example, if we want to generate an image of Spiderwoman looking up and facing the camera, we can use the appropriate metadata.
Positive prompt: “An image from a marvel spiderwoman, focused, decisive, surreal, dynamic pose, ultra highres, sharpness texture, High detail RAW Photo, detailed face, shallow depth of field, sharp eyes, (realistic skin texture:1.2), (freckles, moles:0.6), dslr, film grain”
Negative prompt: “(worst quality, low quality, illustration, 3d, 2d, painting, cartoons, sketch), open mouth”
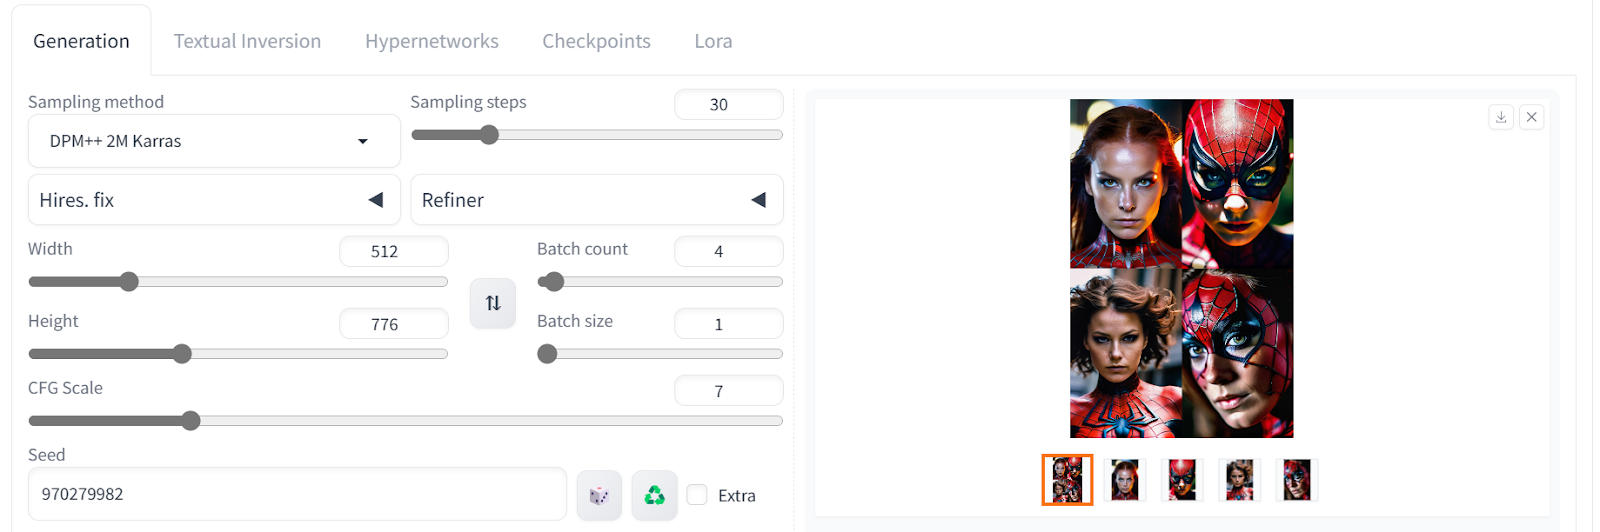
The results are more than perfect. We have achieved perfect lighting, color, skin texture, hair, and facial features.
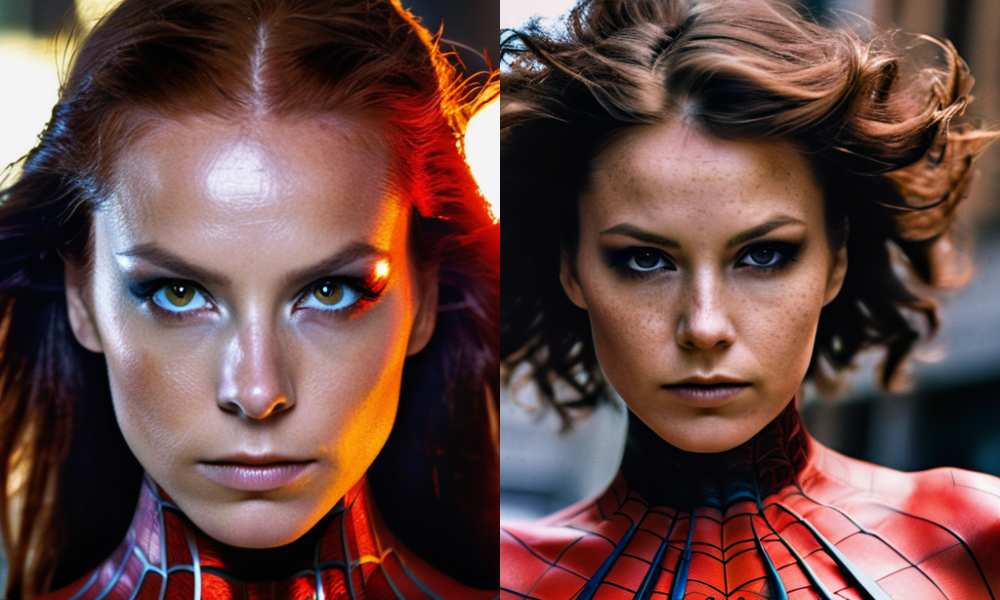
Here are the two best-looking images. If you showed them to your colleagues, they wouldn't even believe that they are generated images.
Currently, the best-performing model out there is DALLE-3; you can learn about it by reading the blog An Introduction to Using DALL-E 3: Tips, Examples, and Features.
Conclusion
The Stable Diffusion Web UI provides an accessible way for anyone to harness the power of AI image generation. This user-friendly interface makes interacting with cutting-edge diffusion models like Stable Diffusion easy, even for non-technical users.
In this tutorial, we walked through downloading, installing, and updating the Web UI on Windows with an Nvidia GPU. With the SDUI setup, we explored core features like text-to-image generation, image-to-image editing, increasing resolution, and more. We also installed extensions to augment the tool's capabilities, using ControNet controls generated images using the OpenPose model.
Finally, we used a fine-tuned model to generate amazingly realistic human faces. Through this brief overview, it's clear the Web UI unlocks creative potential that was once inaccessible without advanced AI and programming skills.
For your next project, try using diffusers in Python to generate photorealistic images with AI. This will help you create your own interface and generate images easily.

Code Along Series: Become an AI Developer
Build AI Systems and develop AI Applications using OpenAI, LangChain, Pinecone and Hugging Face!

blog
What is Llama 3? The Experts' View on The Next Generation of Open Source LLMs

Richie Cotton
5 min
blog
Attention Mechanism in LLMs: An Intuitive Explanation

Yesha Shastri
8 min
blog
Top 13 ChatGPT Wrappers to Maximize Functionality and Efficiency
Bex Tuychiev
5 min

podcast
How Walmart Leverages Data & AI with Swati Kirti, Sr Director of Data Science at Walmart
Richie Cotton
31 min

podcast
Creating an AI-First Culture with Sanjay Srivastava, Chief Digital Strategist at Genpact
Richie Cotton
36 min
tutorial
How to Improve RAG Performance: 5 Key Techniques with Examples

Eugenia Anello